Adding Watermark
Adding Watermark to Composite Video or Live Stream
In this guide, we will explain how to add a water mark to your composite video or Live Stream.
1. Enable Watermark through Dashboard
Screenshots below show the new dashboard. If you use the classic dashboard, pick the Classic dashboard tab — your choice is remembered on every page. You can switch at any time: Old dashboard in the header takes you back to the classic dashboard, and dashboard.metered.ca/v2 opens the new one. What changed in the new dashboard →
- New dashboard
- Classic dashboard
-
Go to Video API & SDK → Rooms and click Create room, or
-
To change a room you already have, open its ⋮ menu in the Rooms list and click Edit (or open the room and click Edit). Changes apply from the room's next meeting session.
In the Watermark section, switch on Enable watermark overlay.
Now upload the image that you want in the video under Watermark image (PNG, JPG or WebP; transparent backgrounds work best), and choose where it sits with Position preset:
- Top left
- Top right
- Bottom left
- Bottom right
Optionally, set a custom Width (px) and Height (px) (leave them blank to keep the aspect ratio), or place the watermark precisely with Position X (px) and Position Y (px), which override the preset.
Note: Composition will automatically be enabled if you enable the watermark.
Then click Create room (or Update room if you are editing).
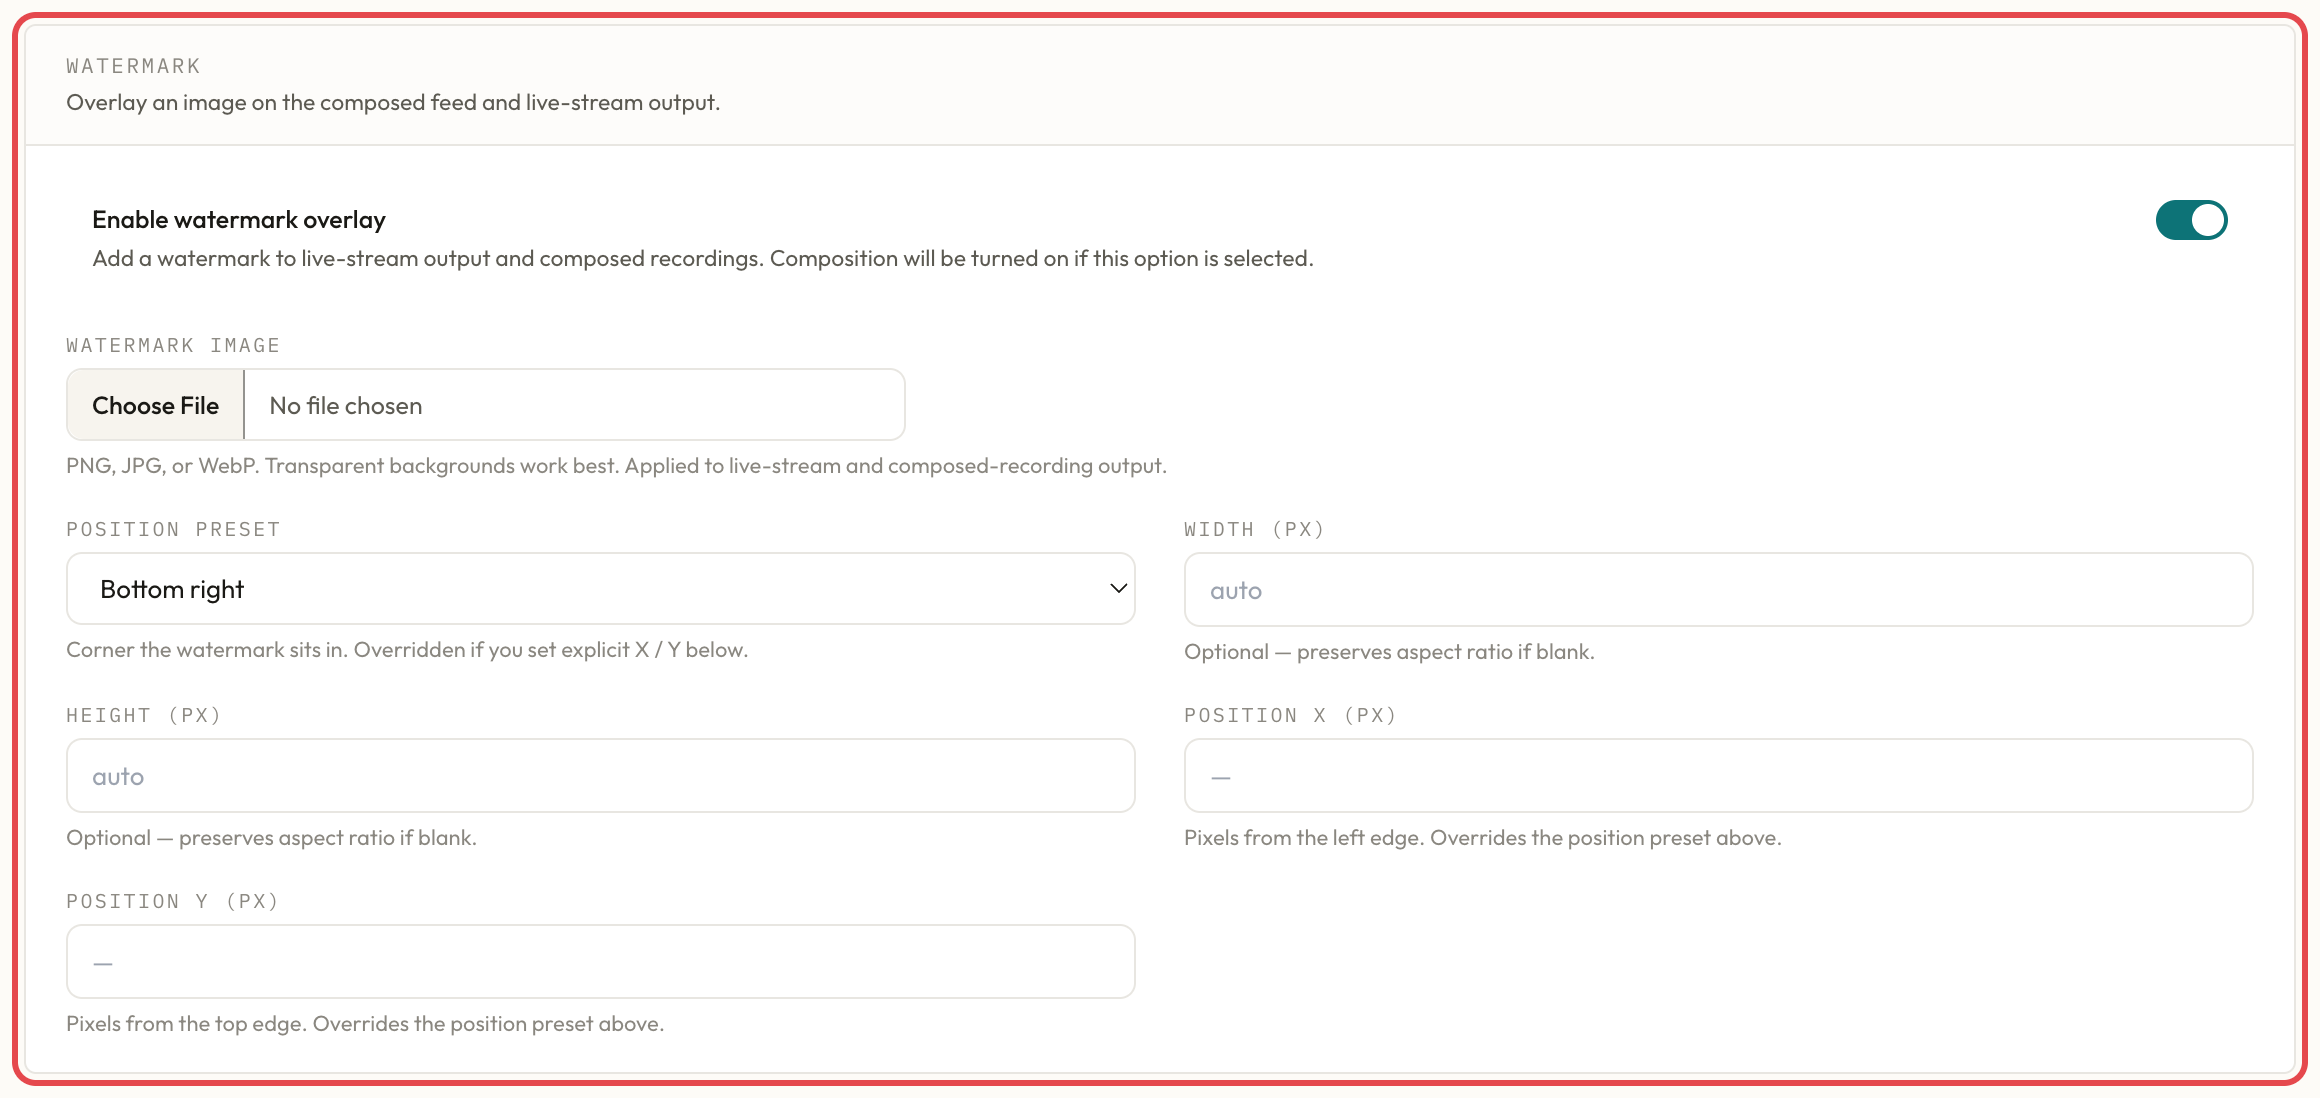 Watermark settings in a room
-
You can go to dashboard then click on the
Create Roombutton or -
Click on the
Roomsbutton and click on the edit button next to the room on which you want to add a watermark
On the Rooms page you can see the Enable Watermark button enable it.
Now, you will have to upload the watermark image that you want in the video and you can adjust the position of the watermark as well using the 4 pre-defined options or position watermark precisely using custom options
These options are:
- Top Left: Position watermark on the top left of the screen
- Top Right: Position watermark on the top right of the screen
- Bottom Left: Position watermark on bottom left of the screen
- Bottom Right: Position watermark on bottom right of the screen
Optionally, you can also specify custom width and height of the watermark also custom watermark position using Position X and Position Y
Note: Composition will be automatically be enabled if you enable watermark in your video
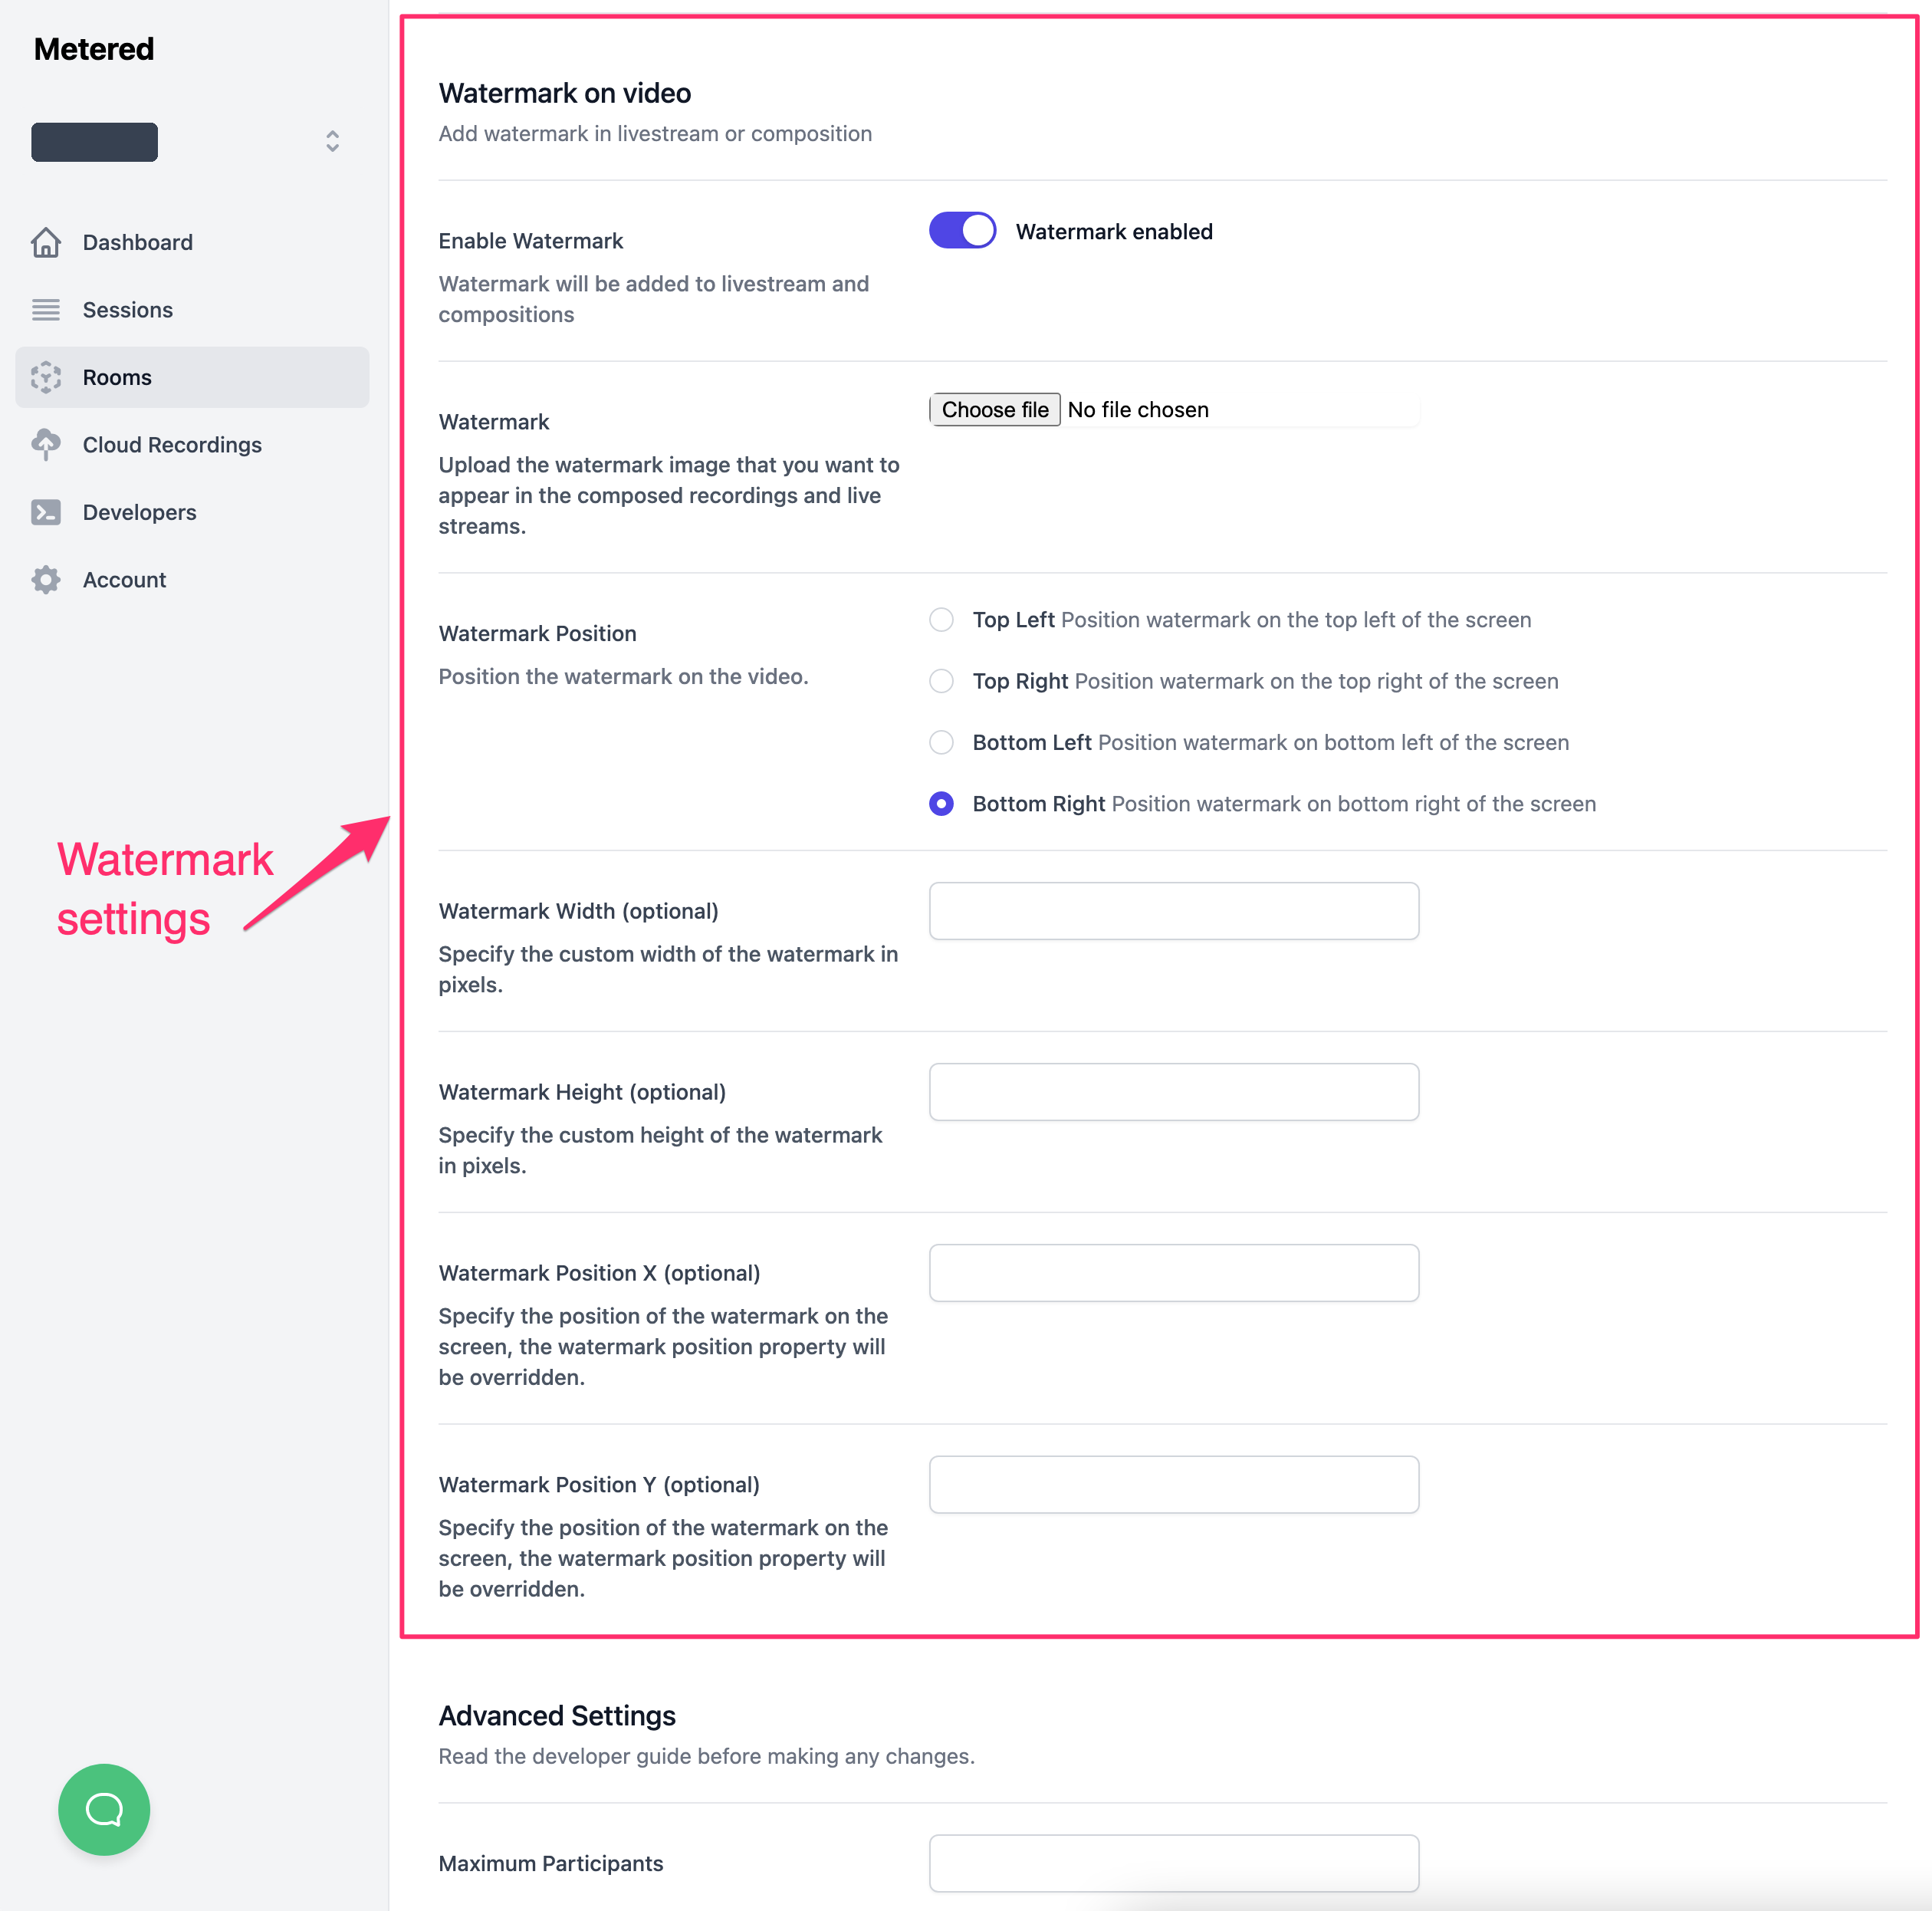 Watermark settings in a room