Using the REST APIs
In this guide you will learn how to use the REST APIs
In Metered we provide the REST APIs to perform all the functions that can be done from the dashboard and more.
To view the complete REST API documentation click here.
Pre-requisite
To use the Metered REST API you need to have an account, if you don't already have an account you can easily signup for a free account from here: https://dashboard.metered.ca/signup
After you have created an account come back here for the next steps. If you have not read the Advanced SDK Guide. we highly recommend that you read it first as it will introduce you to important concepts.
1. Know your Metered Domain/docs/Video-Calls/JavaScript/Tips-and-Best-Practice
Your metered domain is your appname.metered.live where appname is the name of your app that you have created during signup.
Suppose during signup you have named your app simpleapp then your metered domain will be simpleapp.metered.live
Your appname can also been seen on the sidebar of the dashboard.
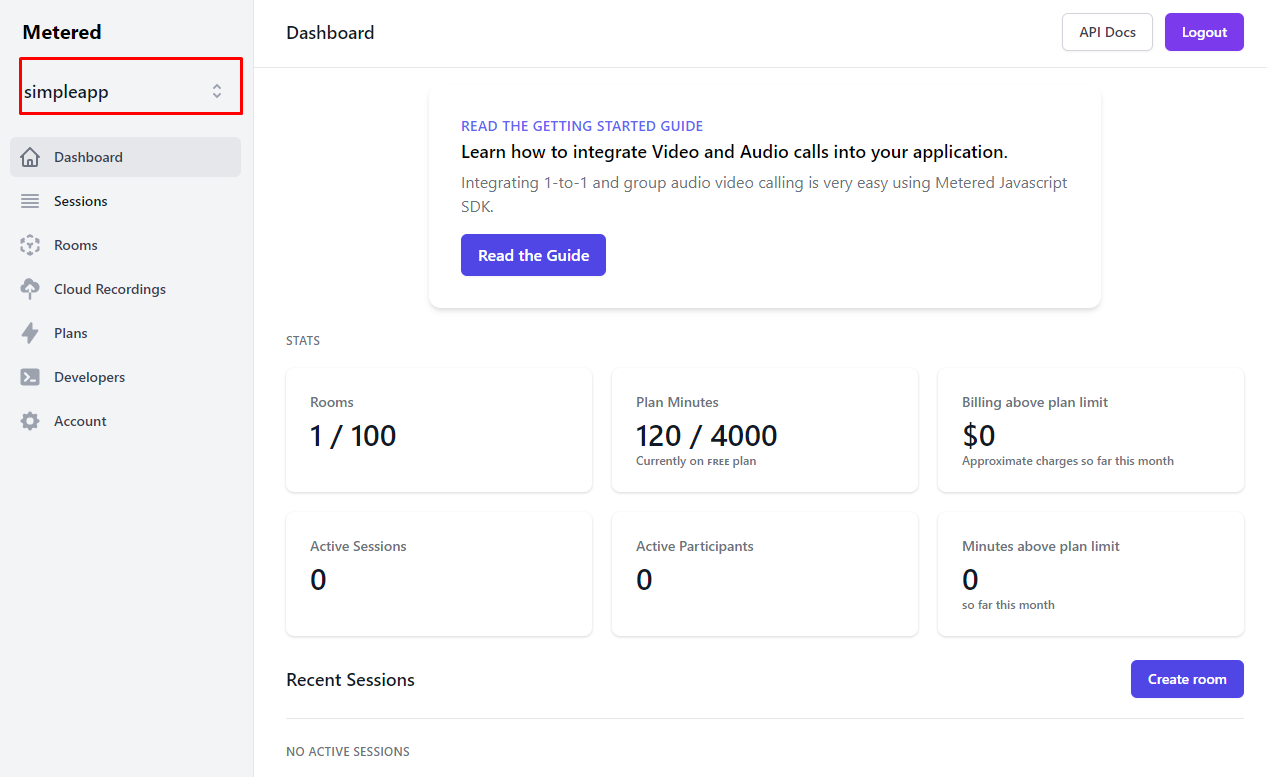 metered domain
2. Acquiring the Secret Key
You will need the Secret Key to authenticate with the API, the Secret Key can be found under the Developers tab on the dashboard.
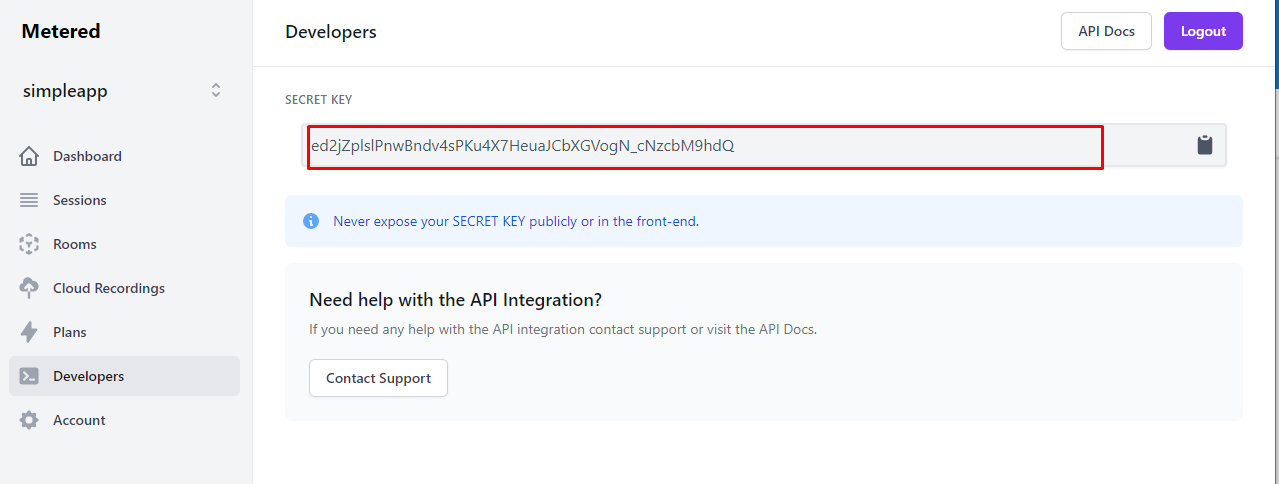 secret key
Once you have obtained the Secret Key we can use it to call the REST API.
Secret Key should never be exposed in the Front End and must always be used by your back-end server-side application.
3. Calling the REST API
To call REST API you would have to send the request to your metered domain, and we have learned how to obtain that in the first step, and sending the secretKey as query parameter.
Here is an example cURL request to Create A Room:
- cURL
- NodeJs
curl --request POST \
   --url https://yourappname.metered.live/api/v1/api/v1/token \
   --header 'Accept: application/json' \
   --header 'Content-Type: application/json' \
   --data '{"globalToken":true}'
{"token":"eyJhbGciOiJIUzI1NiIsInR5cCI6IkpXVCJ9.eyJkYXRhIjp7Imdsb2JhbFRva2VuIjp0cnVlLCJhcHBOYW1lIjoiaHlwcmhvc3QifSwiaWF0IjoxNjI3NzcwNDI2fQ.mVkFCexiE9UFHN8ujvsEVmXLllu2dXmF--4PzBFYjDY"}
You will receive the following response:
{
  "privacy": "public",
  "deleteOnExp": false,
  "autoJoin": false,
  "enableRequestToJoin": true,
  "enableChat": true,
  "enableScreenSharing": true,
  "joinVideoOn": true,
  "joinAudioOn": true,
  "ownerOnlyBroadcast": false,
  "enableRecording": false,
  "ejectAtRoomExp": false,
  "lang": "en",
  "archived": false,
  "_id": "6113f3901baf459debe6a33b",
  "roomName": "myroom",
  "app": "61017571c22d9d49b56f6996",
  "created": "2021-08-11T15:58:08.559Z",
}
4. Explore the Complete REST API
You can find the complete REST API documentation here and explore all the methods that available that you can integrate into your application to create rich experiences for your users.
Conclusion
In the above document, we have described how you can get started with using the REST API, there is a lot more to explore:
- Explore the complete REST API Documentation here
- Explore all the Methods and Events available in the JavaScript SDK
If you have any questions or need any help with the integration feel free to contact us via phone or email.