Recording
Recording the Meeting
In this guide, we will explain how to record a meeting.
Key Concepts
Room: Represents a place where an audio/video meeting takes place. Each room has a unique URL and can have different settings like public or private etc.
Session: A meeting that happened in the room is the session. The session would contain the duration, the number of participants, etc. Each Room would have multiple sessions. and there would be only one session active at a time for each room.
Participant Session: When the user joins a meeting, a participant session is created for the user. The participant session would contain the participant's joinTime, leftTime, browser, os etc.
Recordings have to enabled in a meeting room. You can enable recording by
going to room settings from Dashboard.
programatically through API
We will look into both the methods below:
1. Enable Recordings through Dashboard.
You can go to dashboard then click on the
Create Roombutton orClick on the
Roomsbutton and click on the edit button next to the room on which you want to enable recording.On the Rooms page you can see the Record Room button enable it and the meeting sessions happening in this room will automatically be recorded.
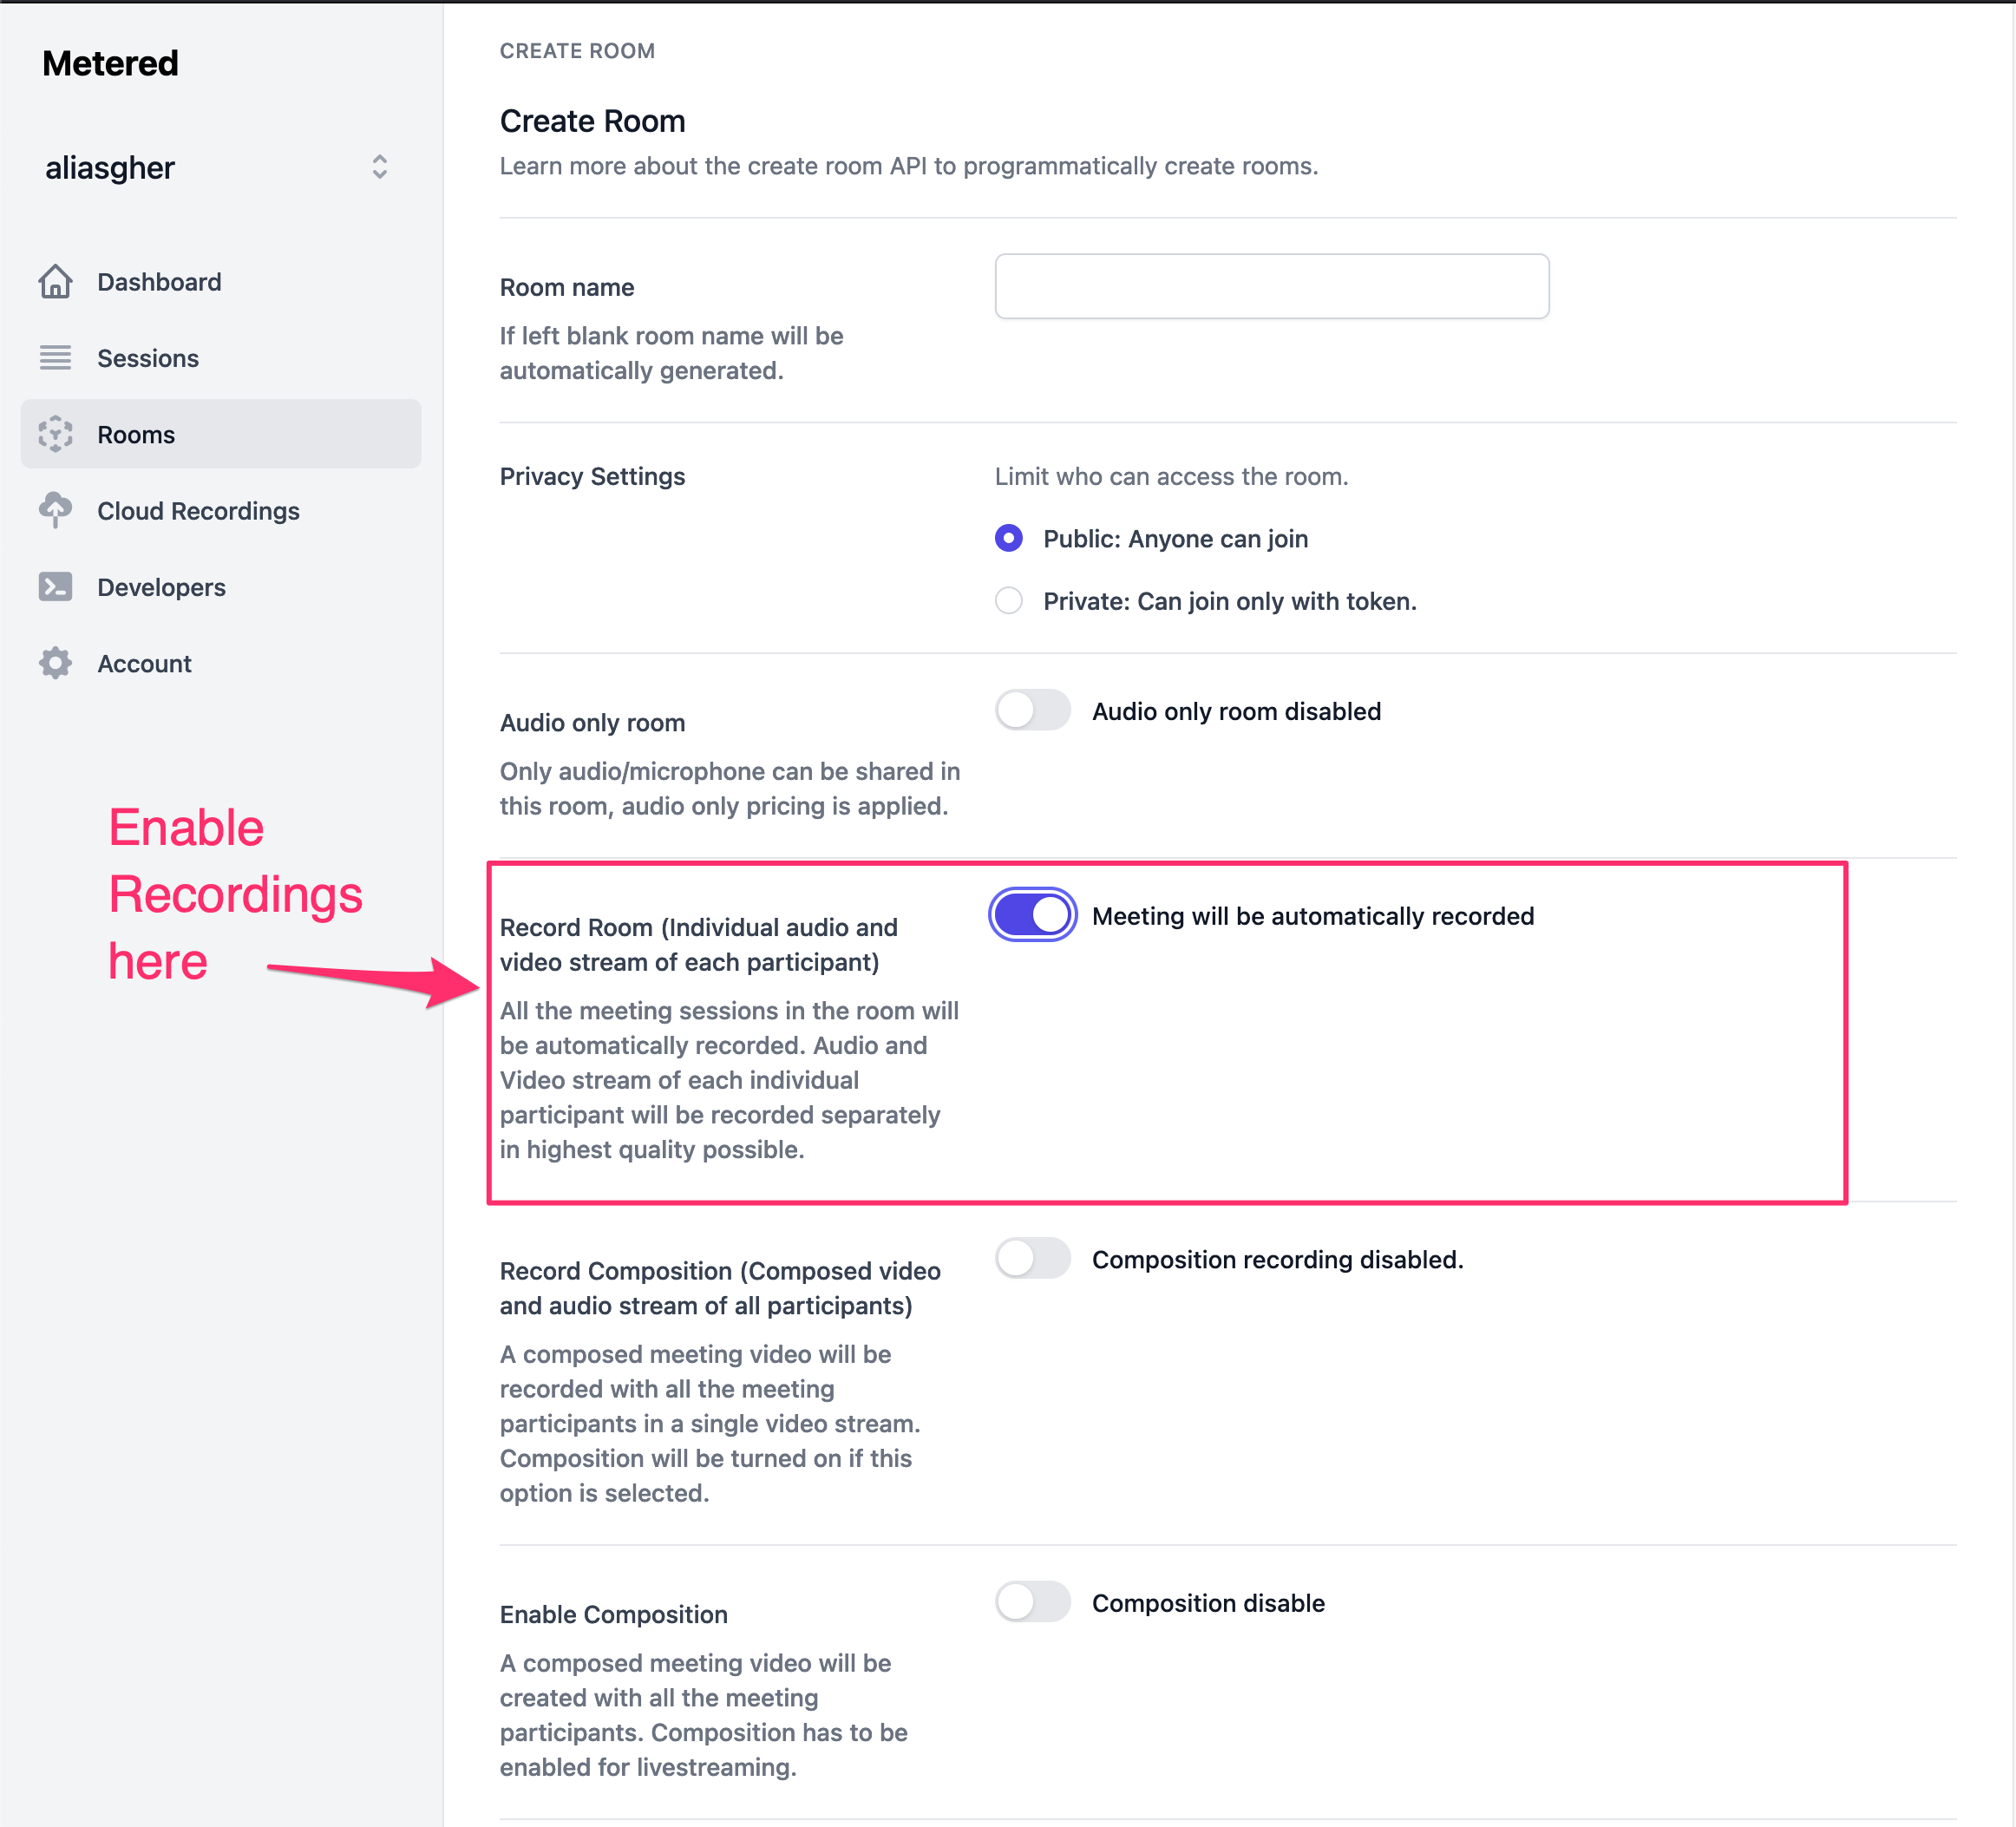 Enable recording in a room
Enabling recording will record individual streams of Audio and Video for each participant separately in the highest quality possible. (Video quality that we receive from users might be different for different users based on network and device capability.)
To record a simple Composed Video of all users, Audio, Video Streams, you can enable composition along with recording.
Managing Recordings through the Dashboard.
You can view, download and delete the recordings from the Metered Dashboard.
Once you are logged in to Metered, go to Cloud Recording you can see a list of your recordings in the table.
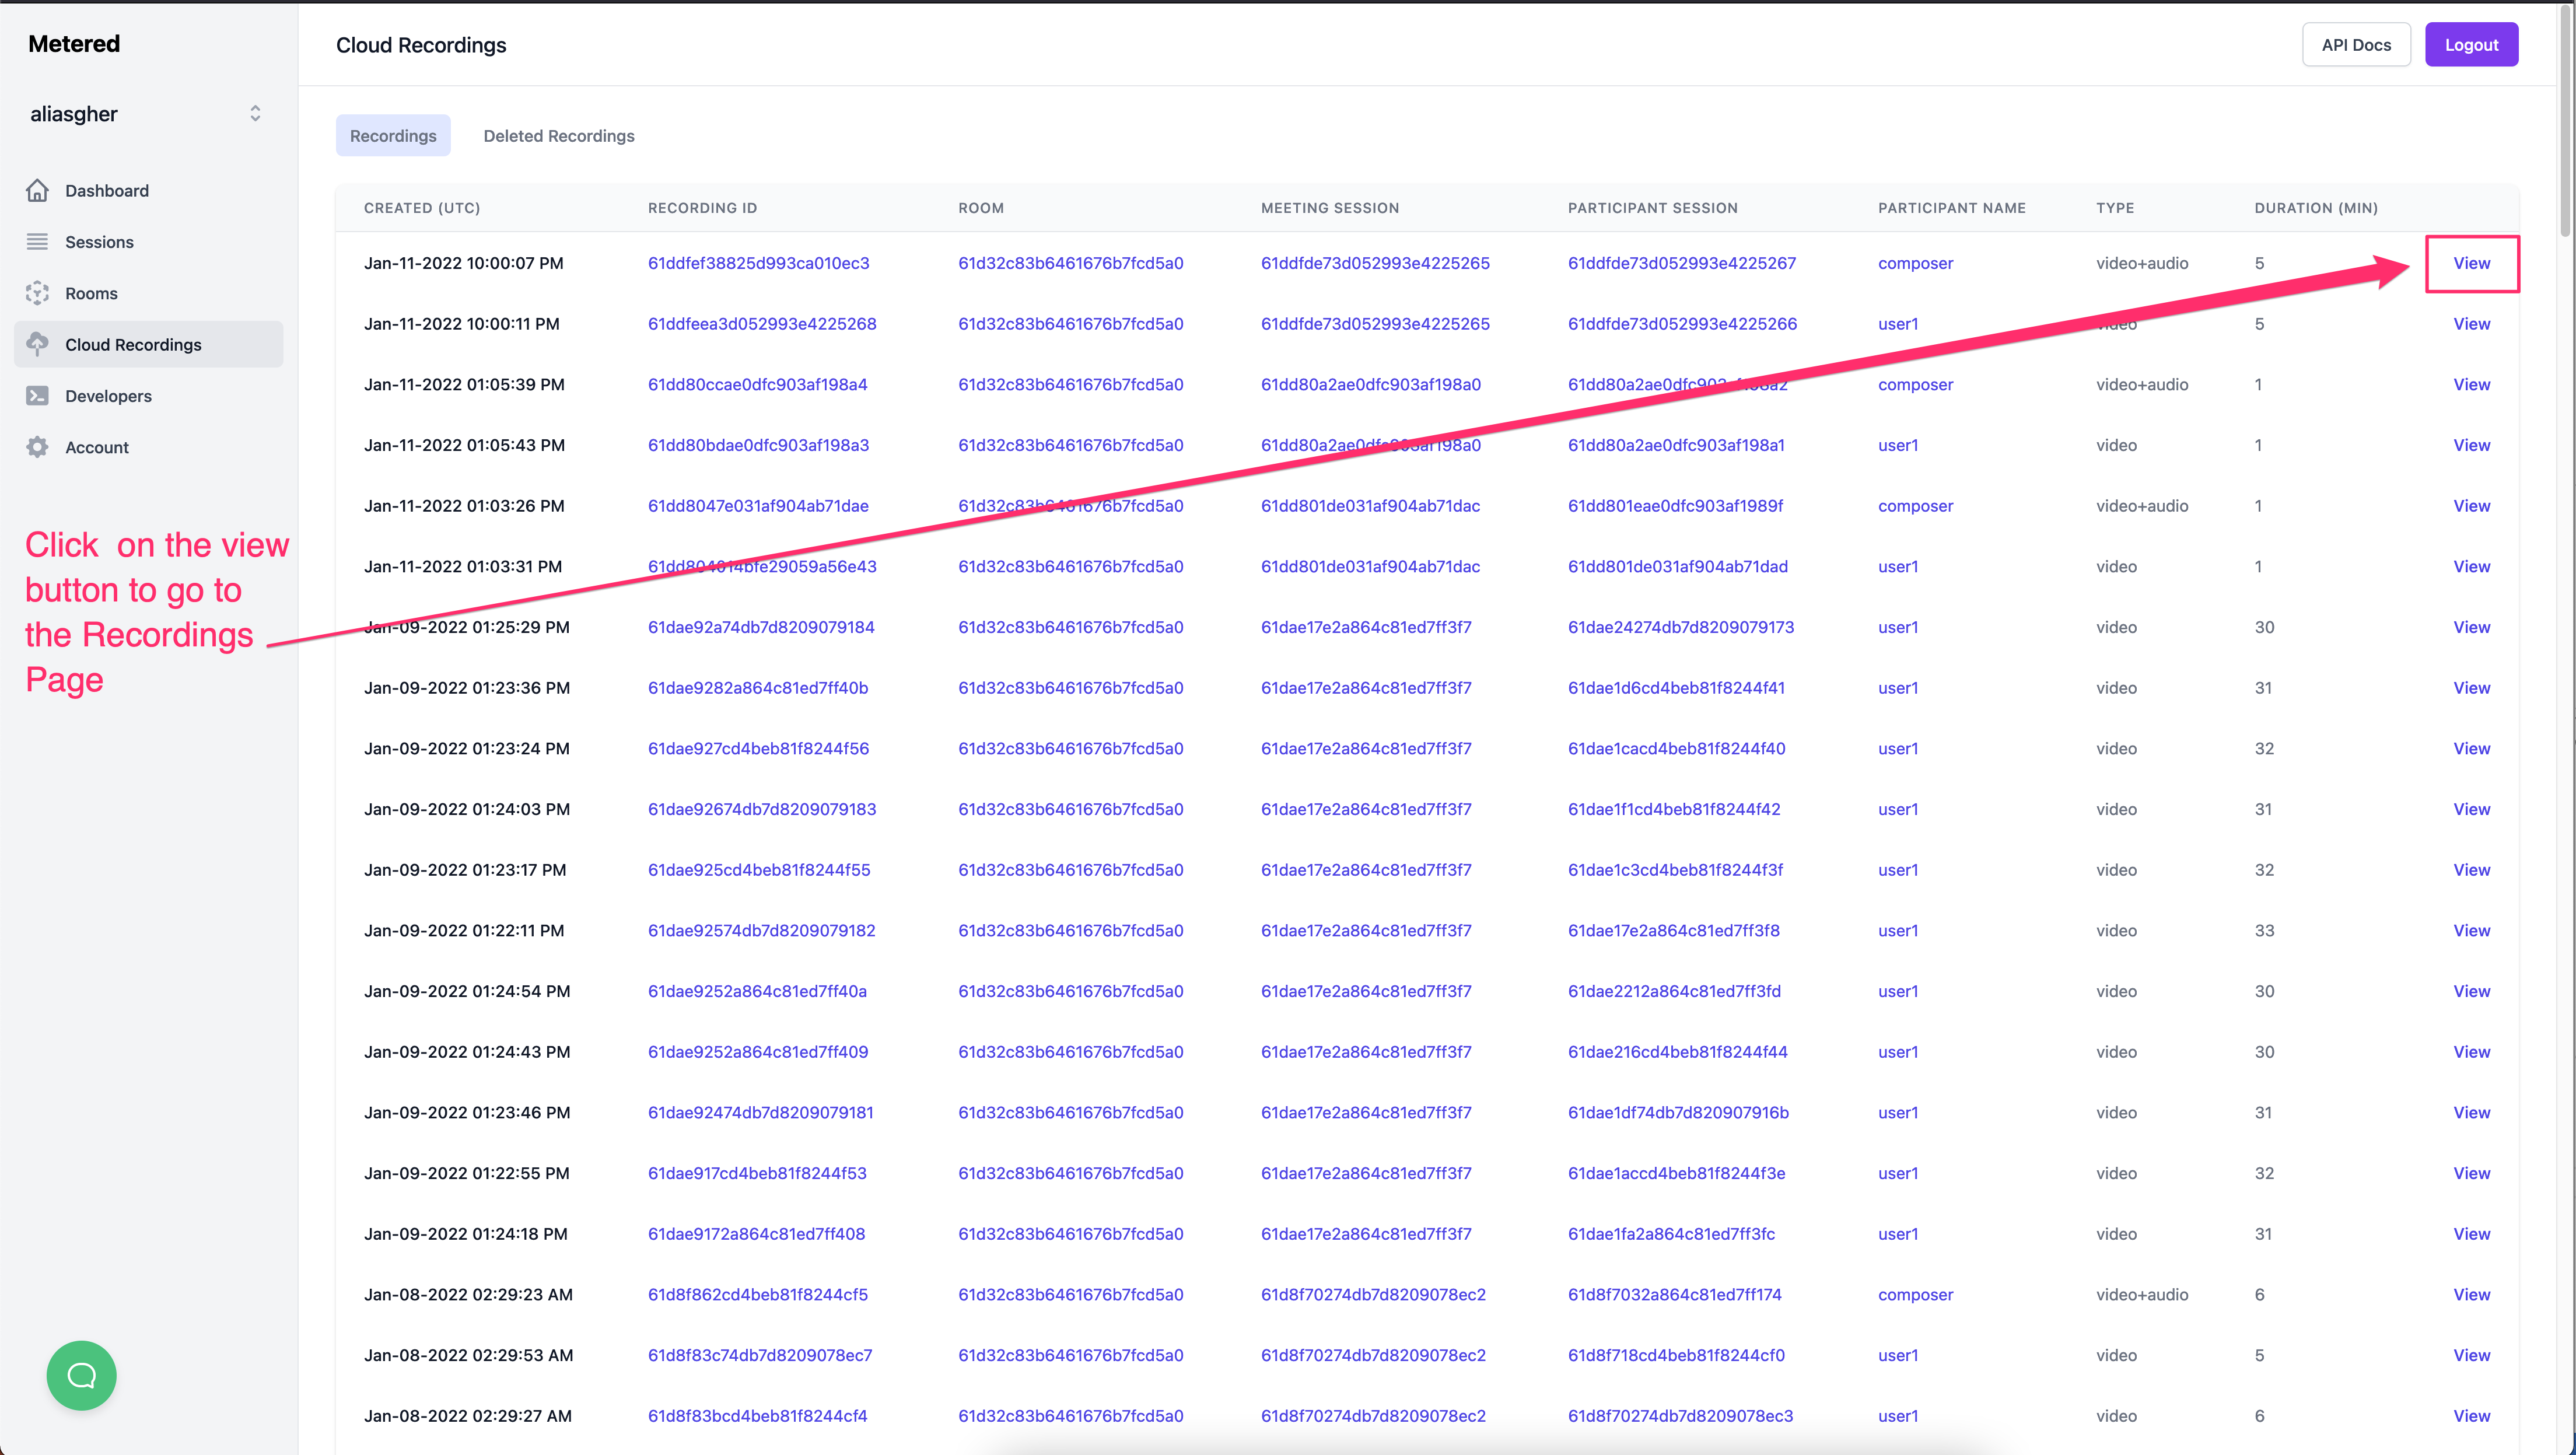 Recordings Table
To view details about the recording click on the view button.
Recordings Table
To view details about the recording click on the view button.
The view button will take you to the Recordings Page there you can see the details about the recording, you can also download the recording and see a 5 min preview of the recording
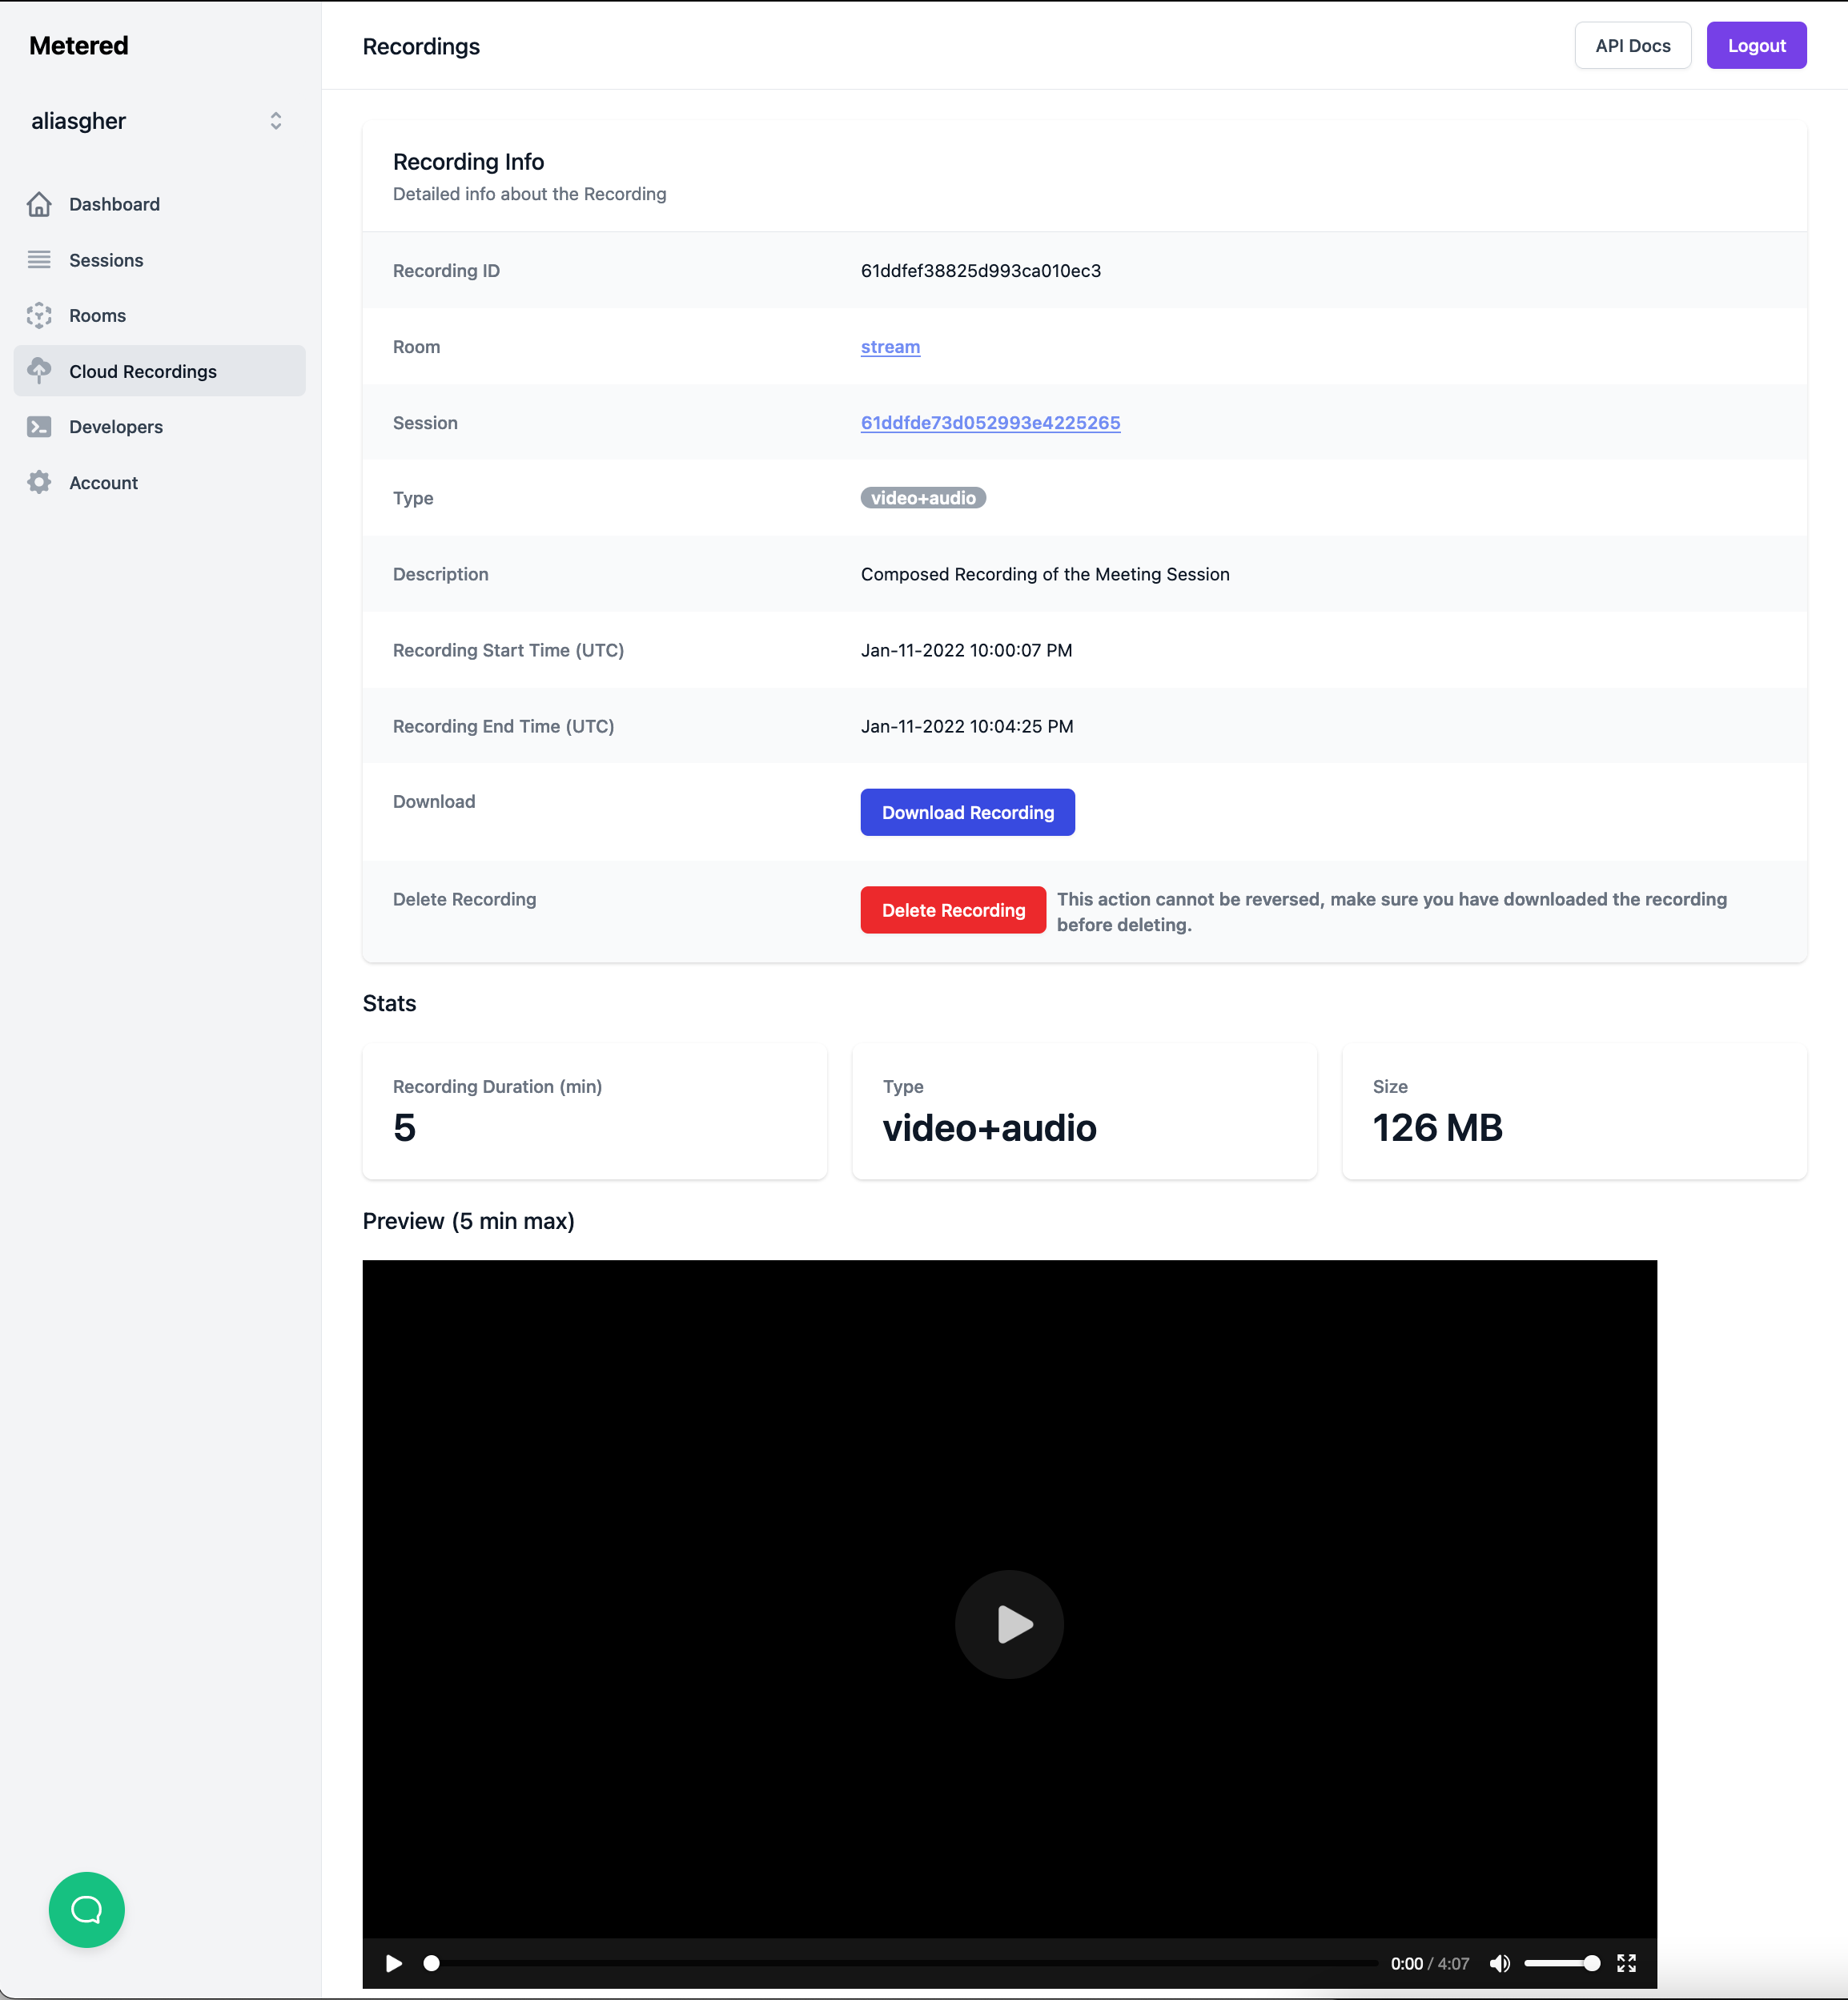 Recording Page
2. Enabling Recording through Rest API.
You can enable recording through rest api by setting the recording:true flag when creating a room.
You can also set recording in an existing room by sending a PUT request through the api and setting the recording flag true / false
To learn more about APIs, visit the API documentation here.
Managing Recordings through the APIs.
We have the following APIs:
- Get All recordings: Get all recordings associated with your account.
- Get All recordings for a specific room.
- Get All recordings for a meeting session.
- Get All recordings for a participant session.
- Download a recording.
- delete a recording
For more details on APIs, visit the API documentation here.