In this guide we will go through the process of setting up optimal TURN Server configuration in Jitsi meet.
We will learn which config file to update, to add the TURN Server configuration and I will also show you from where you can obtain the TURN Server credentials.
What is Jitsi Meet?
If you are reading this Guide then you must be familiar with Jitsi meet. Jitsi Meet is an open-source video conferencing solution, that allows the participants to have a video call with each other.
Jitsi meet uses WebRTC protocol for communication between the participants, and Jitsi Meet first tries to establish first a peer to peer connect between the participants.
Peer to Peer connection means, all the participants in the meeting will send the audio+video feed directly to each other.
Typically web services work in a Client-Server manner, where the client sends all the traffic to the server, and the server forwards the traffic to other clients.
But in a peer-to-peer connection the clients directly send the data to other clients without requiring a server in the middle.
What is a TURN Server?
So we have understood what is Jitsi Meet, why it first tries to establish a peer-to-peer connection.
But often times the clients are not able to connect directly with each other to transmit the data, because the clients are behind a restrictive firewall.
In such scenarios, a TURN Server is required. The TURN server is a large server that has a Public IP address.
The Public IP address allows the TURN server to be reached from anywhere in the internet.
The clients who fails to establish a direct connection with each other, establishes the connection with the TURN server.
TURN Server then relays the traffic from one client to another.
All the traffic that passes through the TURN server is end-to-end encrypted by the clients using DTLS Encryption and the TURN server has no way to view the data that is passing through it.
TURN Server just relays the data from the client who are not able to establish a direct connection with each other.
It is estimated that 40% of traffic is relayed through the TURN server, hence TURN server is necessary for any successful Jitsi Meet Deployment.
Relaying all the traffic consumes a lot of CPU and Bandwidth and hence the TURN servers are large servers and are expensive to run.
Metered Global TURN servers
- API: TURN server management with powerful API. You can do things like Add/ Remove credentials via the API, Retrieve Per User / Credentials and User metrics via the API, Enable/ Disable credentials via the API, Retrive Usage data by date via the API.
- Global Geo-Location targeting: Automatically directs traffic to the nearest servers, for lowest possible latency and highest quality performance.
- Servers in 12 Regions of the world: Toronto, Miami, San Francisco, Amsterdam, London, Frankfurt, Bangalore, Singapore,Sydney
- Low Latency: less than 50 ms latency, anywhere across the world.
- Cost-Effective: pay-as-you-go pricing with bandwidth and volume discounts available.
- Easy Administration: Get usage logs, emails when accounts reach threshold limits, billing records and email and phone support.
- Standards Compliant: Conforms to RFCs 5389, 5769, 5780, 5766, 6062, 6156, 5245, 5768, 6336, 6544, 5928 over UDP, TCP, TLS, and DTLS.
- Multi‑Tenancy: Create multiple credentials and separate the usage by customer, or different apps. Get Usage logs, billing records and threshold alerts.
- Reliability: 99.999% Uptime with SLA.
- Enterprise Scale: : With no limit on concurrent traffic or total traffic. Metered TURN Servers provide Enterprise Scalability
- 50 GB/mo Free: Get 50 GB every month free TURN server usage with the Free Plan
You can create an account on Metered website and get 50GB of Free TURN usage every month
What is a STUN Server?
As we have learned that Jitsi first tries to establish a peer-to-peer connection.
But most of the devices connected to the internet are behind a NAT.
NAT allows muliple devices to share a single Public IP address.
If you have a home internet connection, your internet service provider, gives you a router/modem, that device has one public IP address and all the devices that connect to the router/modem to connect to the internet shares the same public IP.
To establish a peer-to-peer connection, with a device behind the NAT, STUN server uses variety of techniques and punches a hole through the NAT to directly connect to the device behind the NAT.
If the device is unsuccessful in bypassing the NAT then it uses the TURN Server to relay the traffic.
The STUN server do not relay the traffic, they are just used by the devices behind the NAT to determine their Public IP and Port.
If the devices are able to punch the hole through the NAT they share this info with other peers in the meeting and establish a direct connection with each other.
The STUN Server are not expensive to run and provided for free by Jitis, Google as well as other providers.
TURN & STUN Server Configuration in Jitsi Meet
We have learned about the TURN and STUN servers and why it is important, now lets go through the steps of updating the Jisti Meet with TURN Server credentials.
We will learn how you can add the credentials of a TURN Server you are selfhosting, and if don't have a TURN server, I will show from where you can obtain the TURN Server credentials.
Step 1: SSH into your Jitsi Meet Server
SSH into the server where you have installed Jitsi Meet, the SSH instructions depends upon your hosting provider. If you have installed Jitsi Meet then you must be familiar with how to SSH into the Server :)
Step 2: Edit the Jitsi Meet Config
Now we will edit the jisti meet configuration file, the configuration file is located at /etc/jitsi/meet/your-domain-name.com-config.js
<your-domain-name.com> is the domain name that you had provided during the jitsi meeting installation.
sudo nano /etc/jitsi/meet/your-domain-name.com-config.jsStep 3: Update the TURN Server configuration
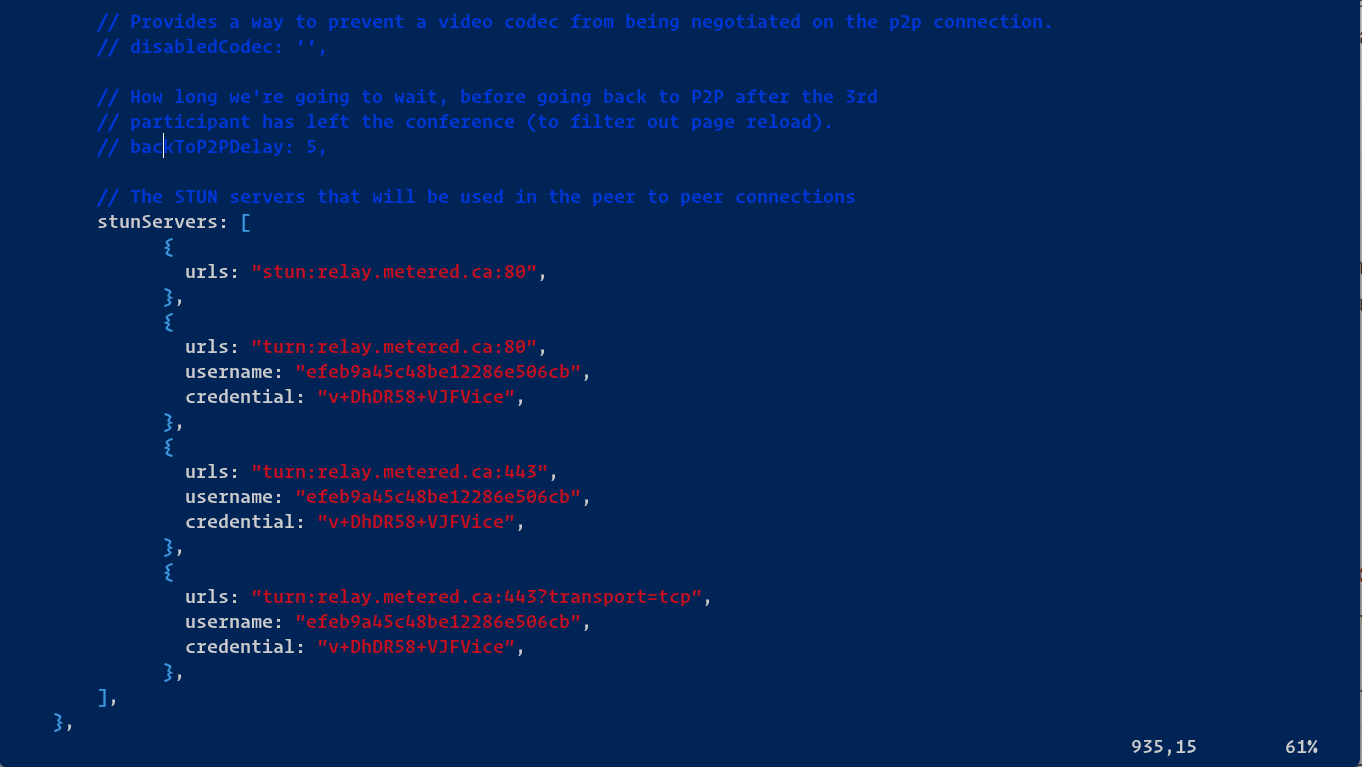
Now scroll down to until you find the line stunServers
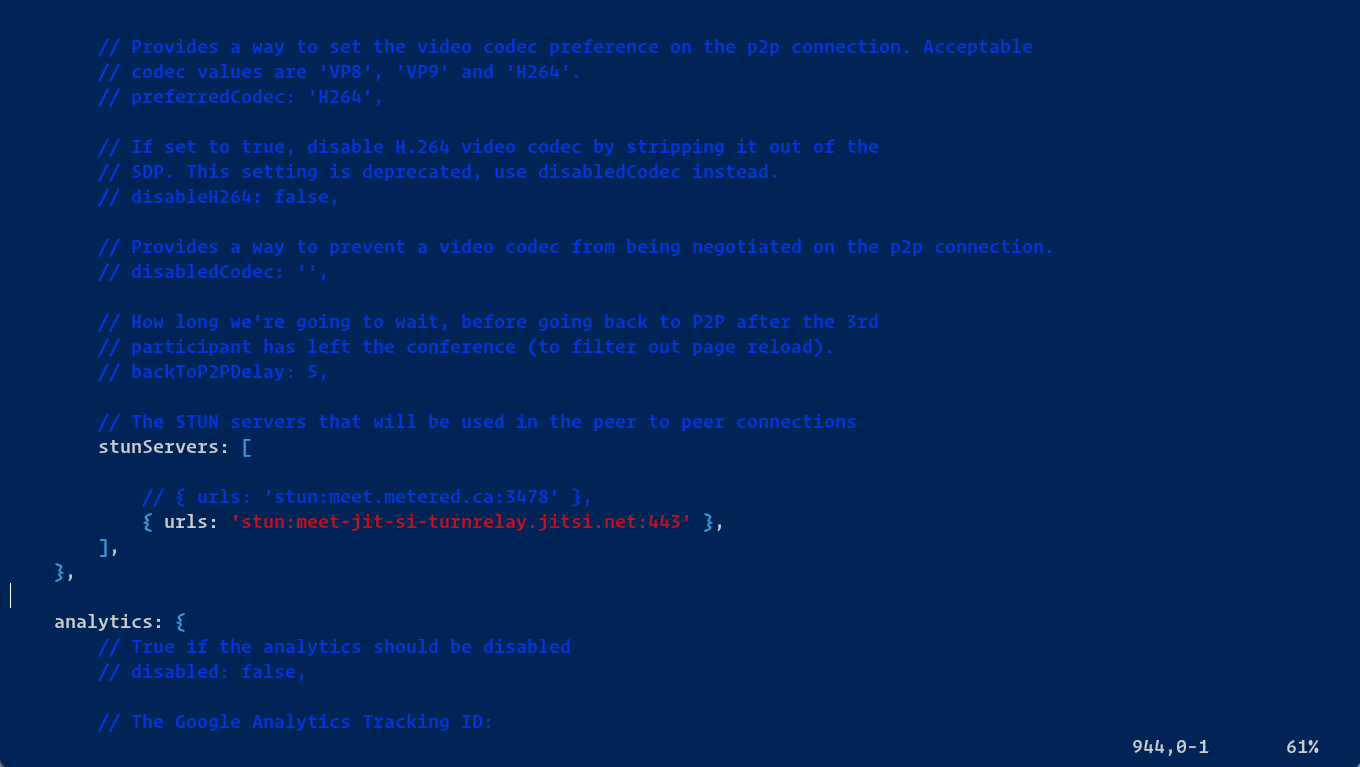
Now here we can add our TURN Server configuration. Here by default Jitsi STUN server is provided. STUN Server is used to establish a peer-to-peer connection, but as we have learned, in many situations peer-to-peer connection cannot be established, hence we need a TURN Server.
You can add the TURN server in the following manner
stunServer: [

    { urls: "turn:your-turn-server.com:443", username: "your-username", credential: "your-password" }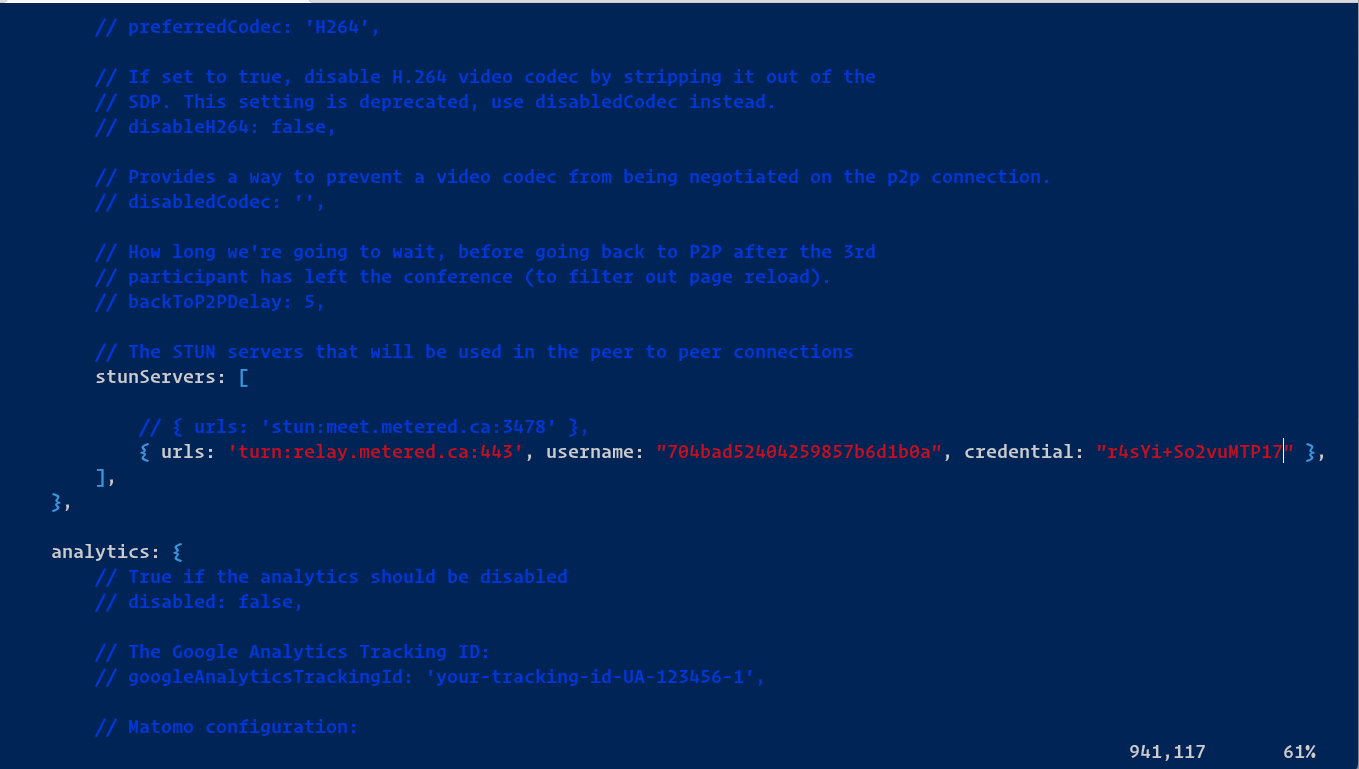
],In the above snippet replace the "your-turn-server.com" with the domain or IP of your TURN server, and "your-username" and "your-password" with your actual TURN server username and password.
In the image below we have used the credentials for actual TURN Server.
Step 4: Obtaining TURN Server Credentials
TURN Server consume a lot of CPU and bandwidth hence they are expensive to run.
We at Metered Video offer free TURN Server Plan which is enough for most users, you can visit here to signup for our free plan.
You can also selfhost your TURN server, for instructions regarding selfhosting your turn server, you can refer to our coturn guide.
The TURN Server from Metered Video has 99.999% uptime with enterprise grade reliability and is a cost effective solution.
Once you have signup for a free account go to dashboard->turn server page click on "Add New Credential" button
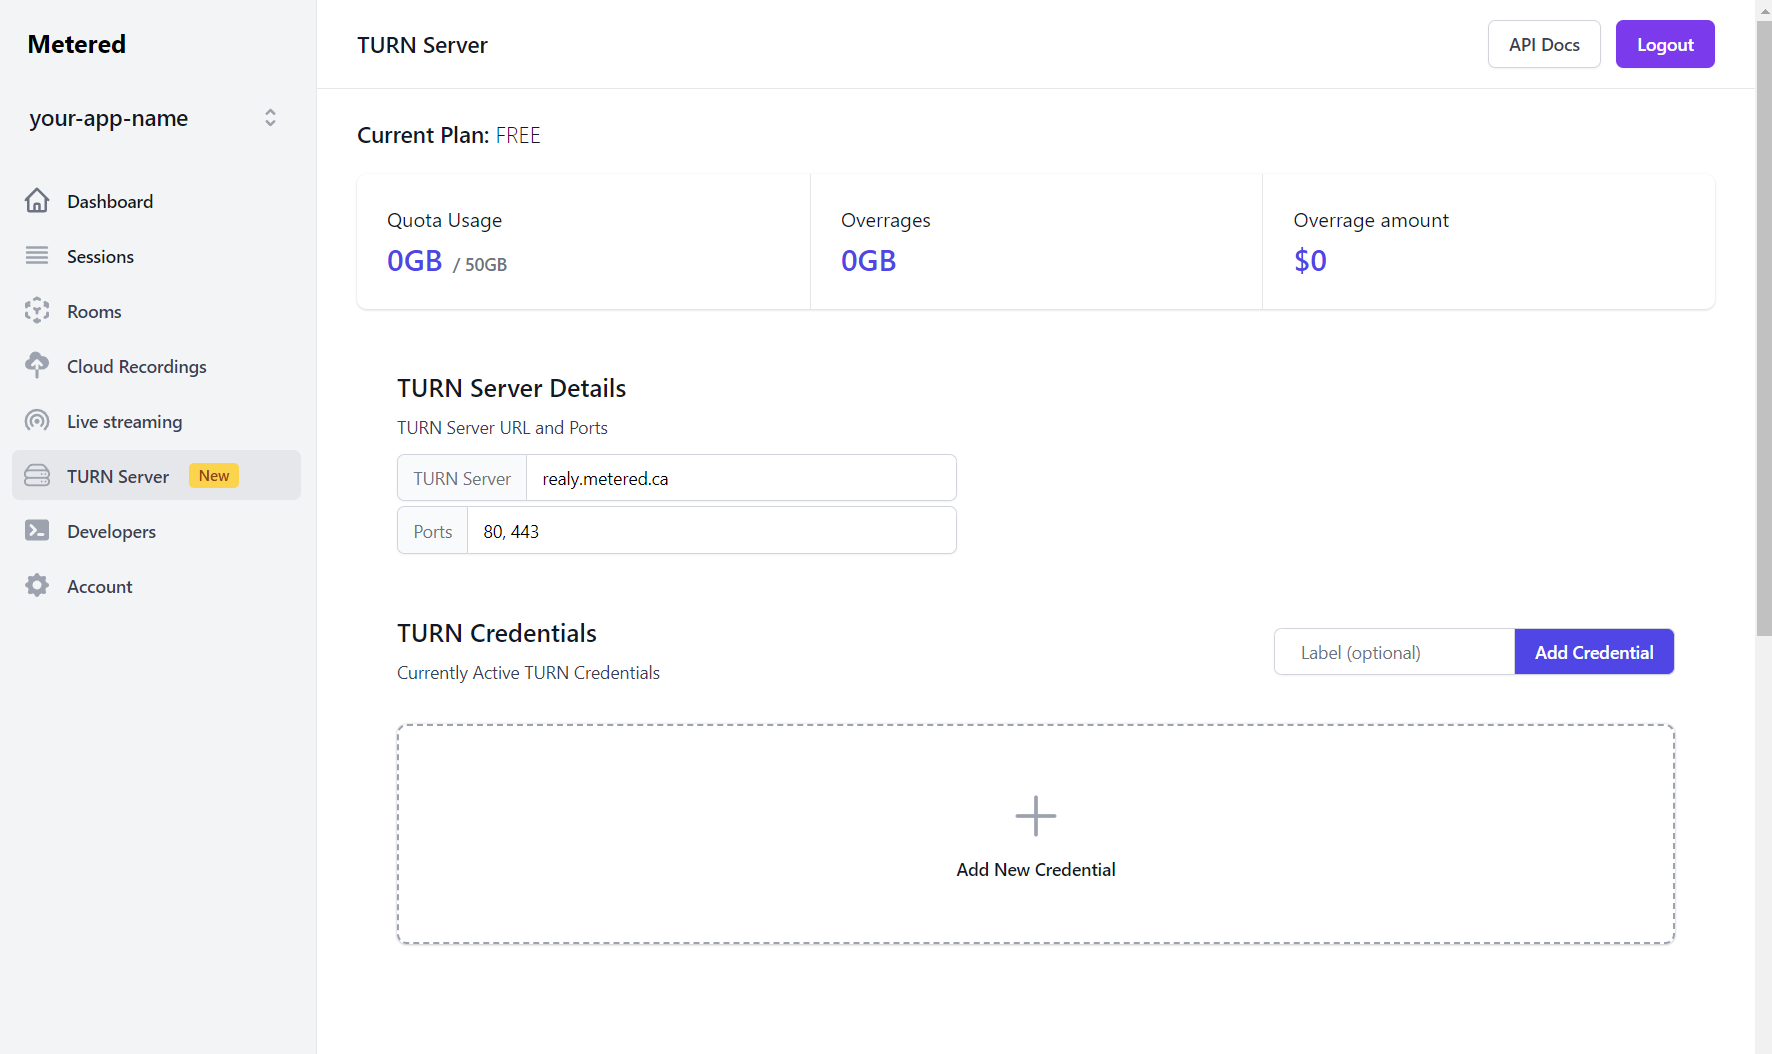
Then click on the "instructions" button
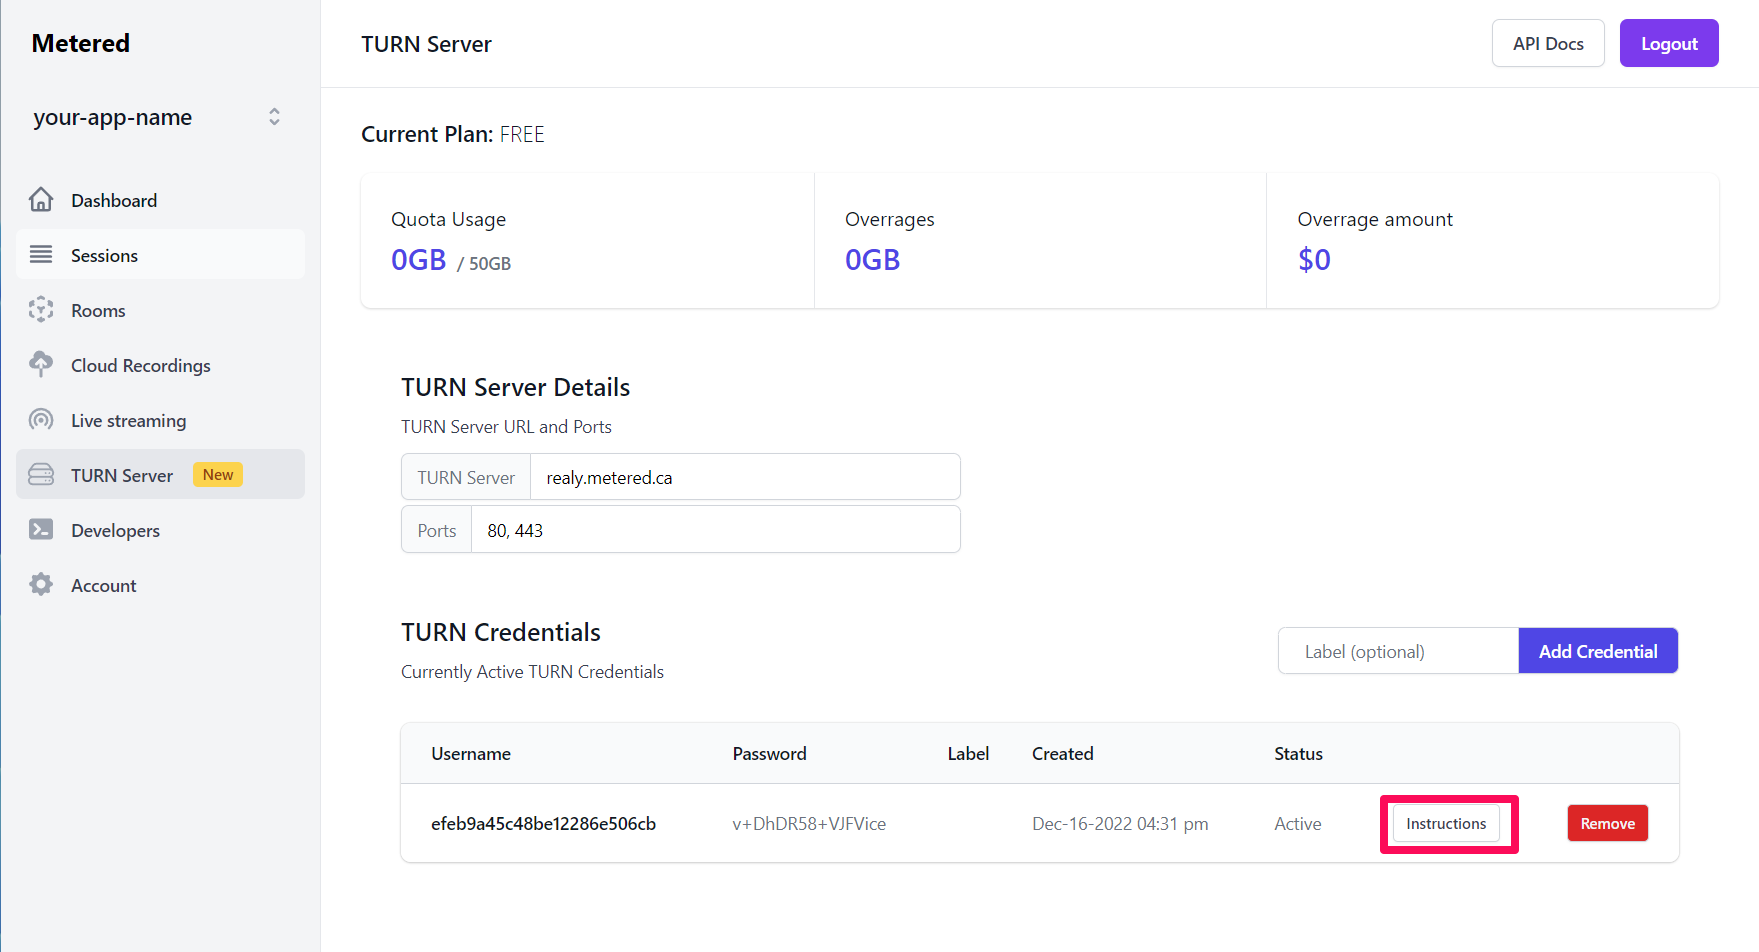
From the instructions popup copy everything in between the square brackets [ ]
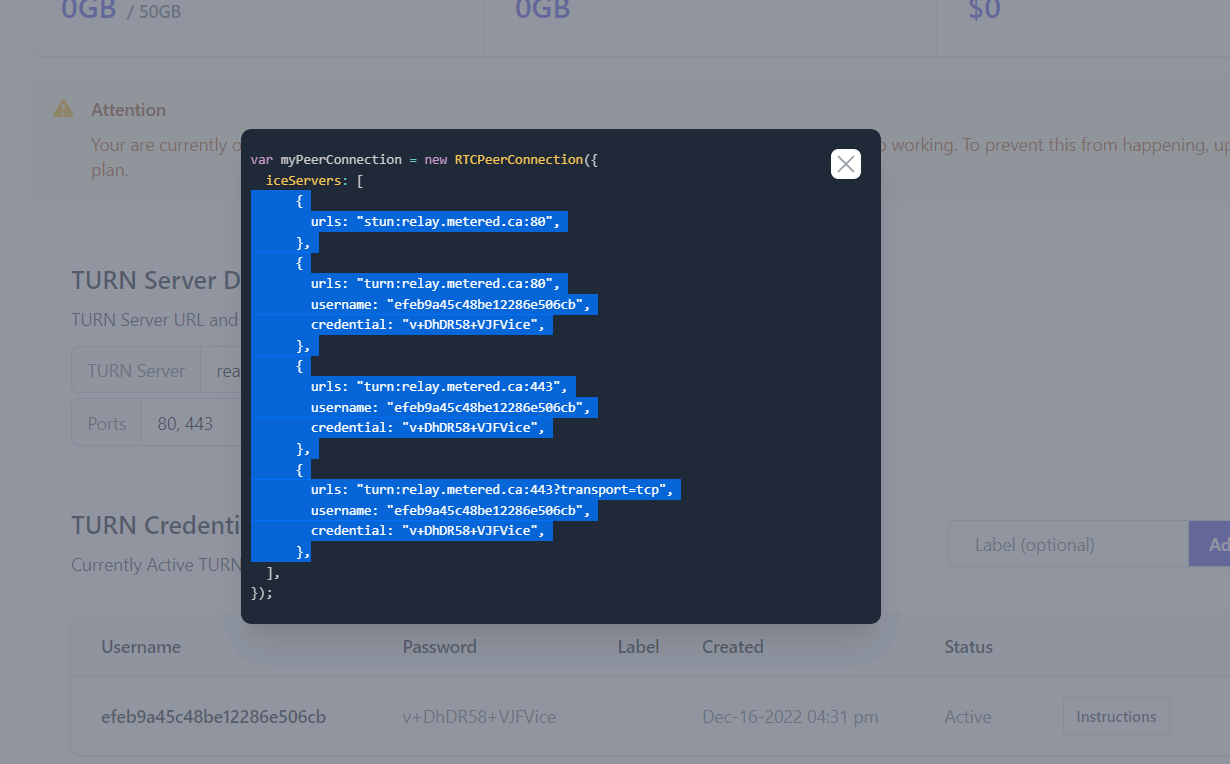
Then delete everything under the stunServers array and paste it inside the stunServers array []
Now save exit the editor by pressing Cltr+x and y
Step 5 (optional): Force all the traffic through the TURN Server
If you want force the clients to relay all the traffic through the TURN server then you can remove the line
{
	url: "stun:relay.metered.ca:80"
},
Now, why you would want to relay all the traffic through the TURN server?
TLDR: To Speed up the time it takes to connect the call.
If you relay all the traffic through the TURN server, then the clients will not try to establish a peer-to-peer connection with each other.
To establish a peer-to-peer connection with each other the clients uses a STUN Server, and uses hole punching technique to gather ICE candidates and determines the open port and public IP address, to learn more about this in detail read STUN Server and NAT Traversal.
Gathering candidates and determining the open port and public IP takes time.
Then it determines whether it is a able to establish a peer-to-peer connection, if establishing a peer-to-peer connection fails, it fallbacks to the TURN server.
All this process increases the time it takes for the user to connect to the meeting.
To speed up the time it takes for the user to connect to the meeting, we can eliminate this process altogether.
If we remove the STUN Server URL and only provide the TURN Server URLs then all the connections will be relayed through the TURN server by default.
The user will be connected to each other through the TURN server.
The drawback of this is that as all the connection will be relayed through the TURN server, your TURN Server bandwidth consumption will increase.
If you are selfhosting your TURN server then it might add some latency to the call if the TURN server is far away from the users in the meeting.
For e.g If there are 2 users in a call and both of them are in London, and the TURN Server is in US then it would add some latency to the call as all the connection would have to be routed through US.
If one user is in London and another is in US, and the TURN Server is in U.S, then it doesn't make much difference as the video stream would have to reach U.S to connect to the user in U.S.
If you are using Metered TURN Server, then we automatically route the traffic through the TURN Server nearest to the user.
Now lets get back to our configuration, now if we reopen the Jitsi meet configuration file, and scroll down the the stunServers array and remove
{
	url: "stun:relay.metered.ca:80"
},
Our final configuration will look like the image below:
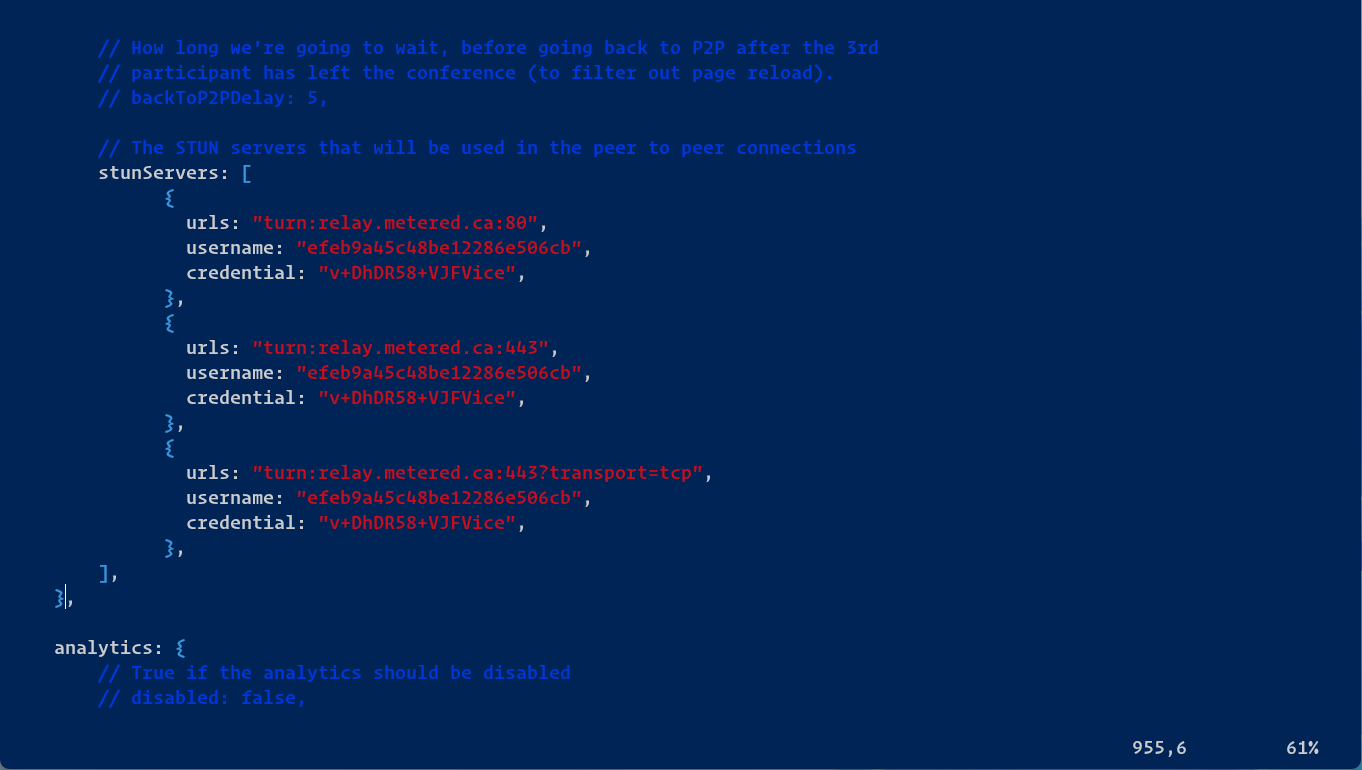
In the image as you can see there are only TURN URLs and there is no URL that begins with stun:
Step 6: That's it!
We have learned how to setup TURN Server in Jitsi Meet and also gone through the process of obtaining the TURN Server credentials and an optional step to force all the traffic through the TURN server decrease the time it takes for the user to connect the call.
Why Choose Metered TURN Server?
Metered TURN Server offers 99.999% uptime and it is ultra-low latency, provides routing to the nearest server to the user.
It also offers a generous free plan which would be sufficient for most users and saves cost running your own TURN Server.
If you are a large organization that would use the TURN Server heavily then in that case as well, using Metered Video TURN Server would prove to be a cost effective solution, because you will pay more in bandwidth + EC2 instance cost in AWS.
Also it is hard to achieve 99.999% uptime selfhosting the TURN server and adds more operational overhead.
Conclusion
In this guide we have learned what is a TURN Server, why it is essential in Jitsi Meet and we went through the process of setting up the TURN server configuration in Jitsi Meet and discussed selfhosting vs using Metered TURN Server.
If you have any questions or comments you can contact us support[at]metered.ca or book a meeting with our specialist.