This guide has been updated on April 25 2025
In this guide we will be learning how to run fully functional, scalable and secure CoTURN in a docker container.
COTURN is a free and open source TURN server that can be used for WebRTC video and audio communication and also VoIP services
Prerequisites
- You should have docker installed on your system. Learning how to install docker on your system is out of the scope of this article
- Some basic knowledge of docker is recommended but not required
- You have a Public IPv4, most cloud VPSes give you one
- Host OS is Ubuntu LTS, we use commands such as
aptandufw - Docker version 24 or newer is installed
- Docker compose v2 is installed (optional)
- Port 80/TCP is free (optional)
- Have a domain name (
turn.yourwebsite.com) (optional)
You can use the Metered TURN server for this. You can create a free account
TL;DR One-Command Quick Guide
# Run CoTURN 4.6.3 in Docker (production-ready)
docker run -d --name coturn \
  -p 3478:3478 -p 3478:3478/udp \
  -p 5349:5349 -p 5349:5349/udp \
  -p 49152-65535:49152-65535/udp \
  -e DETECT_EXTERNAL_IP=yes \
  -e STATIC_AUTH_SECRET=$(openssl rand -hex 16) \
  coturn/coturn:4.6.3
- What does it do
-dmaps the required TURN ports (i.e 3478,5349, and RTP relay range)- sets
DETECT_EXTERNAL_IP=YESauto discovers your public IP STATIC_AUTH_SECRETseeds the secure credentials for long term auth- Image tag
4.6.3is the latest stable release
Next: copy the command, then wait for the container to start, lastly test the connectivity with TURN server testing tool
Installation
Docker offers a CoTURN image that can be used to setup the CoTURN server easily in a container
- Create project directory
Let us create a directory on our server to hold the config file.
mkdir ~/coturn_docker
cd ~/coturn_docker
we can keep the docker-compose.yml and other files in this directory.
Step 1 Pull the Docker Image
to install the docker coturn. Pull the docker image of the coturn from the cloud repository Docker Hub.
Type the below command in your terminal to pull the docker image
docker pull coturn/coturnStep 2: Configure the coturn file
Once you have the docker image you can start the docker container by running the following command on your terminal
# Run CoTURN 4.6.3 in Docker (production-ready)
docker run -d --name coturn \
  -p 3478:3478 -p 3478:3478/udp \
  -p 5349:5349 -p 5349:5349/udp \
  -p 49152-65535:49152-65535/udp \
  -e DETECT_EXTERNAL_IP=yes \
  -e STATIC_AUTH_SECRET=$(openssl rand -hex 16) \
  coturn/coturn:4.6.3
What are we doing here
- -d: runs the docker container in detached mode. That is it will be running in the background
- -p : specifies the ports on which the TURN server will run we are using the ports 3478, 5349, and port range from 49152-65535
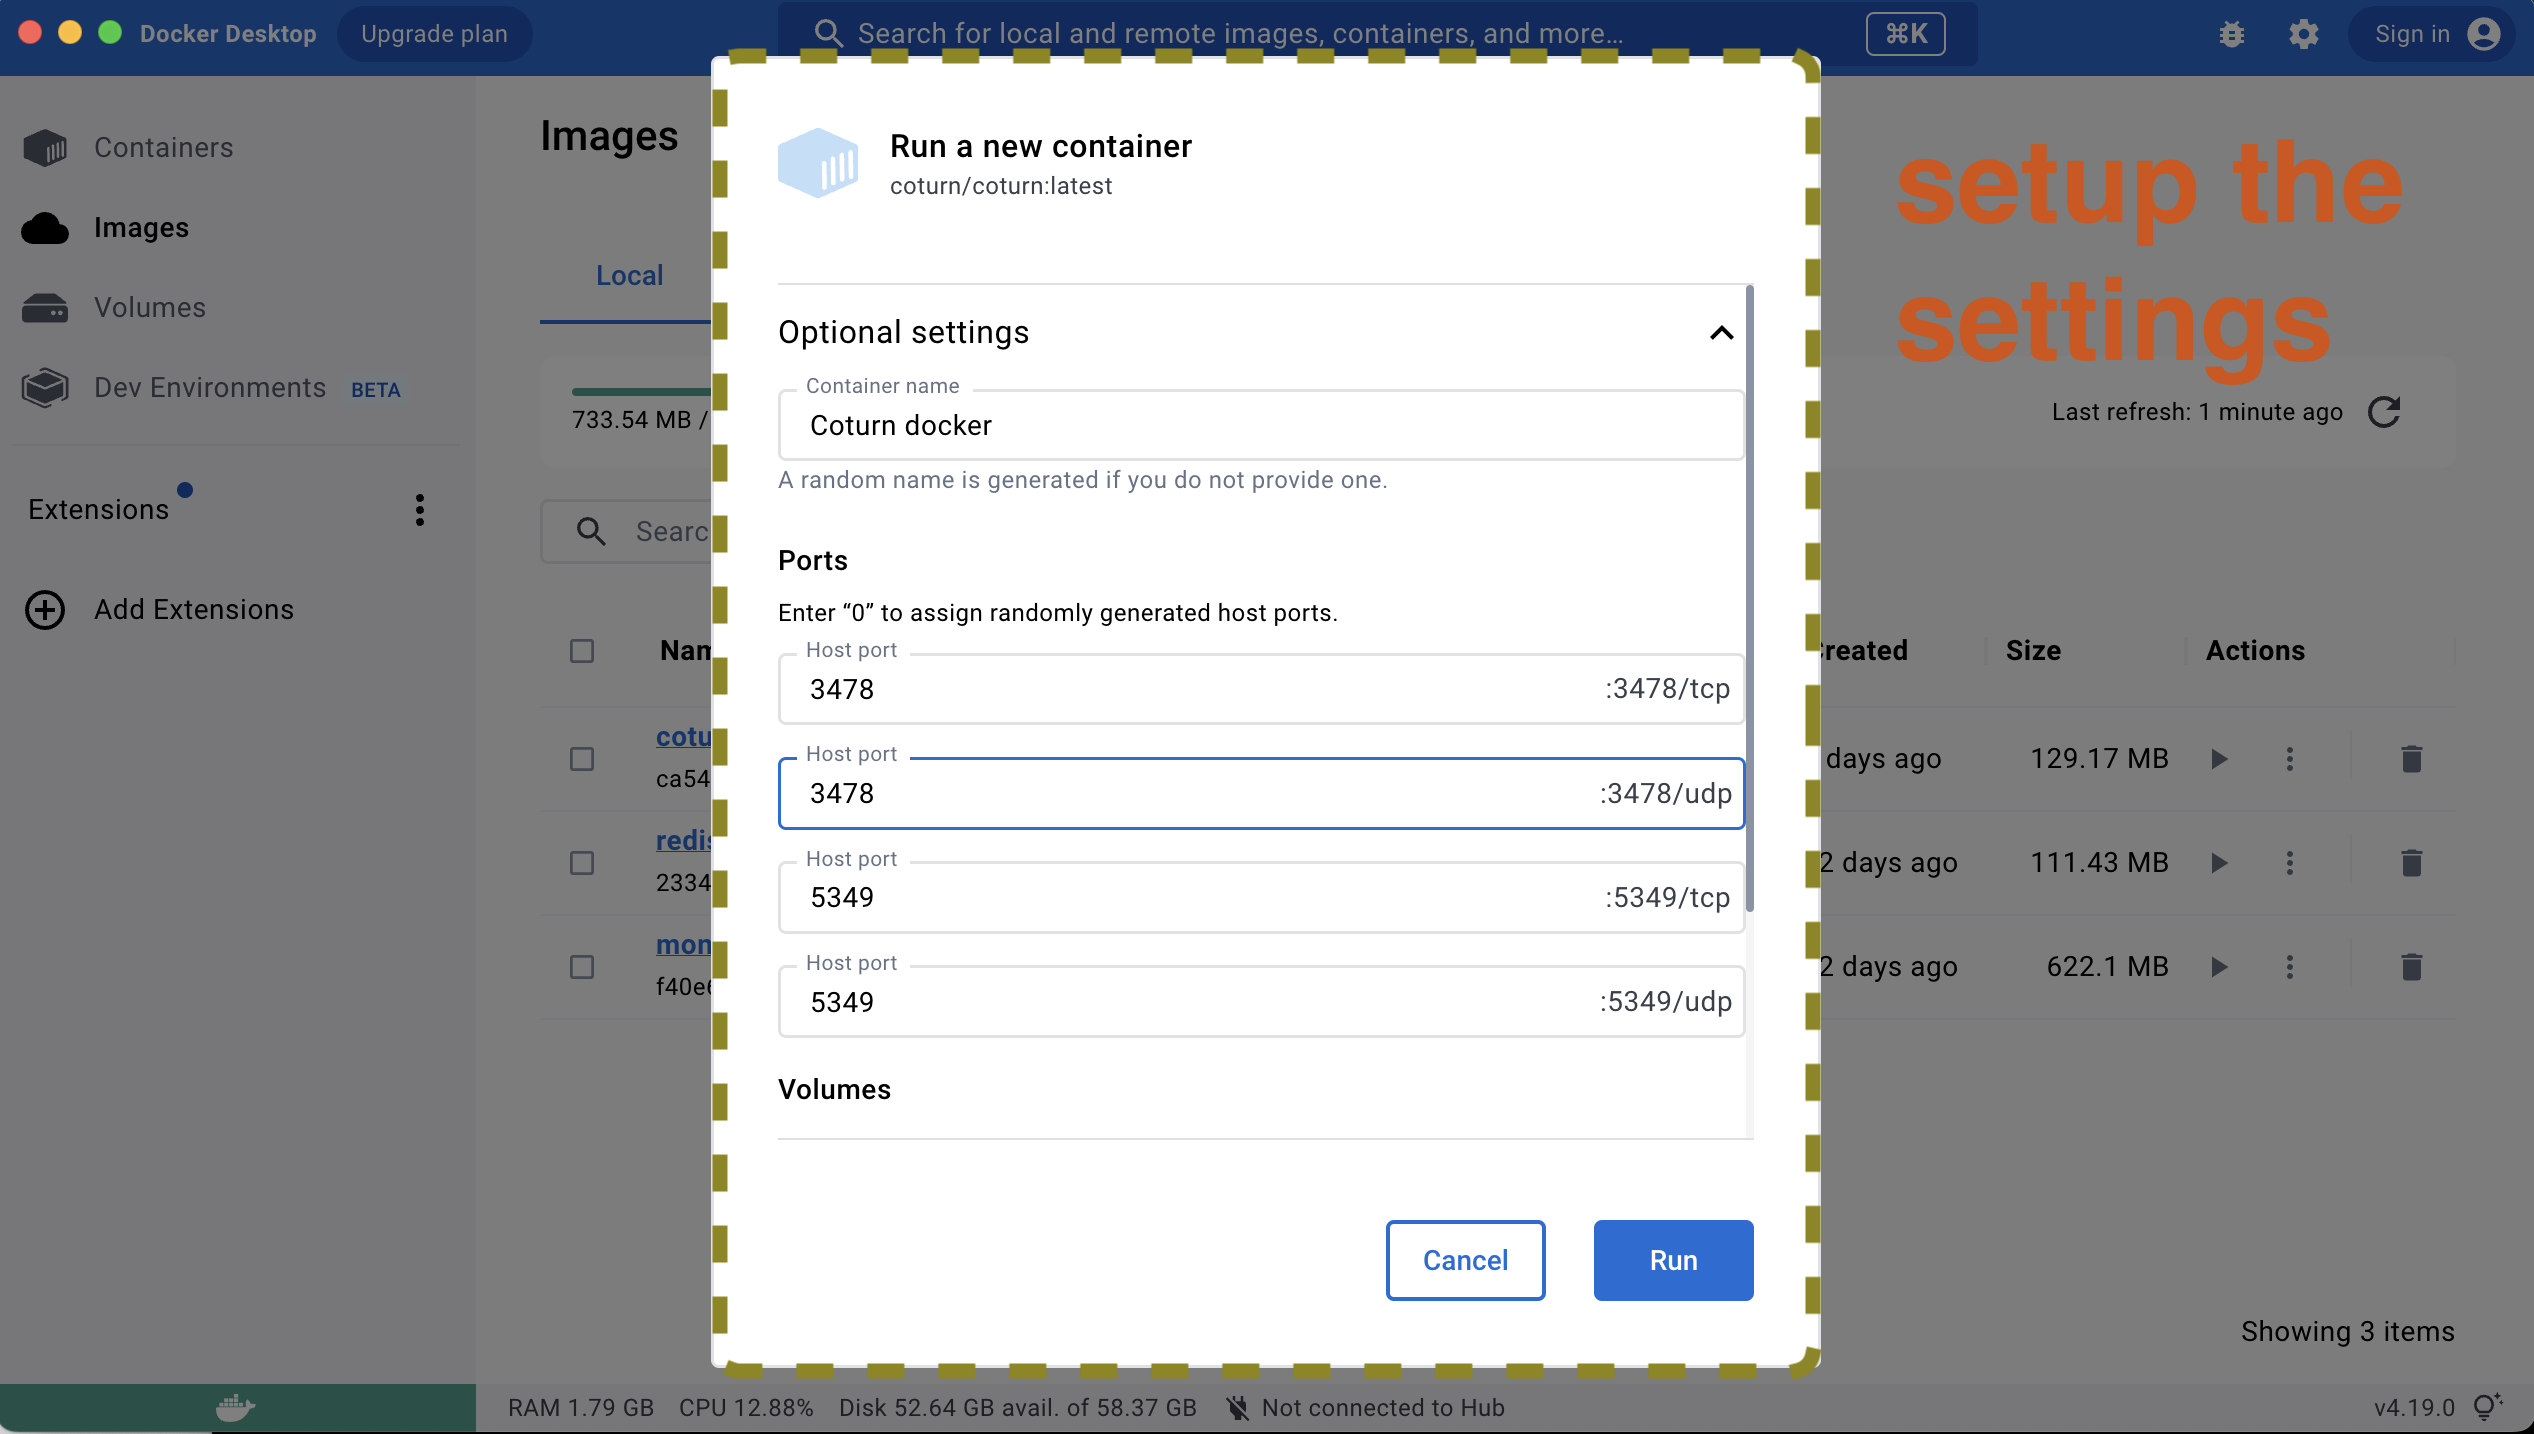
You can also run this in Docker desktop if you have that installed on your computer
just pull the docker image as showed in the step 1 and then
do the similar settings in the docker
The TURN server needs a lot of ports to exchange media this is specified in the RFC 5766
Now that we have setup the TURN server. Let us now configure it in the next step
Step 3: Configuring the TURN server
By default the coturn docker container uses the coturn's default configuration that is specified in the CMD Dockerfile
If we need to edit the default configuration we can do so by specifying the volume command when running the docker container
docker run -d --name coturn \
  -p 3478:3478 -p 3478:3478/udp \
  -p 5349:5349 -p 5349:5349/udp \
  -p 49152-65535:49152-65535/udp \
  -e DETECT_EXTERNAL_IP=yes \
  -e STATIC_AUTH_SECRET=$(openssl rand -hex 16) \
  -v $(pwd)/custom.conf:/etc/coturn/turnserver.conf:ro \
  coturn/coturn:4.6.3
This command maps the custom.conf file on the current directory to the turn server directory '/etc/coturn/turnserver.conf'
What is realm?
Realm is a key that can access a group of addresses with a common owner.
A TURN server has a default realm but can have multiple "named realms" in the database
Each realm has its owners and a username/ password combination to access and identify the users that connect to a specific realm
Step 4: Turn server persistence
CoTURN docker by defaults persists the data in the '/var/lib/coturn/' directory
If we need to store the data in a different directory we can do so by specifying the -mount option in the docker run command
paste the code below in your terminal to specify a different file
docker run -d --name coturn \
  -p 3478:3478 -p 3478:3478/udp \
  -p 5349:5349 -p 5349:5349/udp \
  -p 49152-65535:49152-65535/udp \
  -e DETECT_EXTERNAL_IP=yes \
  -e STATIC_AUTH_SECRET=$(openssl rand -hex 16) \
  --mount type=tmpfs,destination=/var/lib/coturn \
  coturn/coturn:4.6.3
this command mounts the tmfs that is the temporary file system to the docker container and specifies that the coturn write the data in the temporary file system instead of writing the data on the /var/lib/coturn file
You can do this if you do not want the data to be written on your disk thus saving disk space at the cost of having the data on the temporary file system
Step 5: Firewall rules
open the firewall ports for turn server
sudo ufw allow 3478,5349/tcp comment 'STUN/TURN TCP'
sudo ufw allow 3478,5349/udp comment 'STUN/TURN UDP'
sudo ufw allow 49152:65535/udp comment 'TURN relay range'
Step 6: Getting the Coturn server url from the docker container
Since the docker container runs inside your machine. You will the server url to access the TURN server
First, you will need to know the IP address of your Docker host and the port that you have mapped to the COTURN server inside the Docker Container
In our example above we mapped the Docker container to the port 3478 of our local machine and we are running the docker container on our localhost or 127.0.0.1
So the URL of the Coturn will be
turn:IP_Address_Docker_host:3478
that is
turn:127.0.0.1:3478
If your host address is some other private IP address like 192.1688.1.22 or some other you can easily map it using the above formula.
If you want to know what your local IP is
ip addr showin you linux or mac terminal
But there is problem here. For us to be able to use the Turn server outside of our local machine we will need to map it to a public IP address
Step 7: Assigning Public IP to docker COTURN
To use the TURN server we need the ability to access it over the internet. Fo that we need a public IP address that we can assign to the TURN server
Here are the steps involved
- Get a Public IP address: If you are running the docker container in an AWS, google cloud or some other cloud providers instance they give you a public IP address with the instance
If you are running the docker container in your local machine then you need an IP address from your ISP internet service provider
You can go to websites like IPMango to find out what your public IP address is
2. Configure the PORT forwarding on your router: You need to configure your router if your local machine is behind one to forward all the traffic to your local machine
specify the local ip address and port number usually 3478 in the router.
If you are running the docker container on an aws instance then its not a problem
3. Update the firewall rules: Make sure to allow inbound an outbound traffic on the port number your coturn server is running. If you are running the coturn in the cloud you need to provide the rules in the cloud server
4. Final Step: Configure the Coturn server: you need to configure the coturn server to use the public IP. Open the coturn configuration file and update the 'external-ip' parameter to the external IP of your machine
Step 8 : Testing whether the CoTurn is running
You can test whether the docker coturn server is running in three ways
- Trickle ICE
- ICE Test
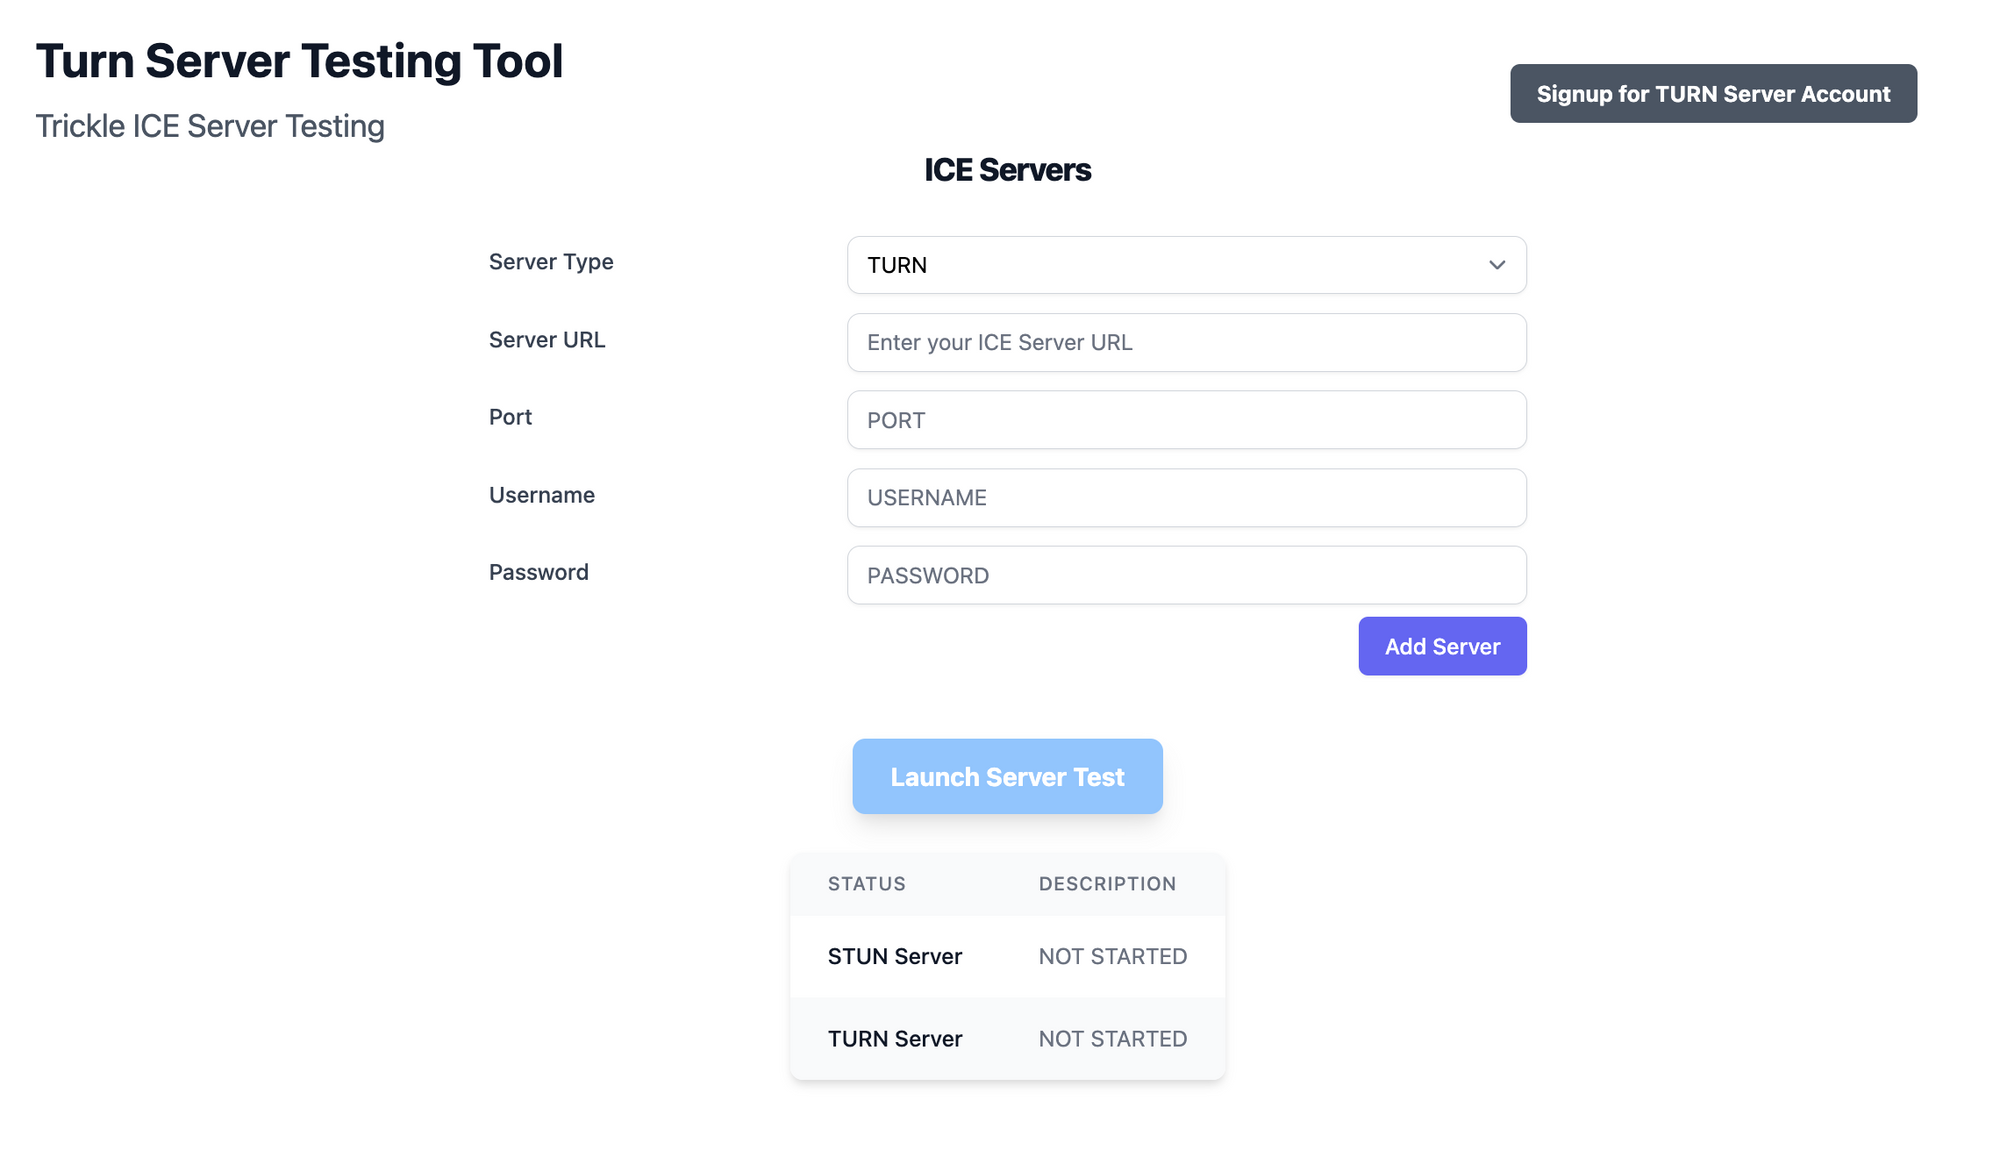
Trickle ICE
go to the website: https://www.metered.ca/turn-server-testing
and add the configuration and click on the add server button to add your TURN server and test it
ICE TEST
Go to ICE Test website : https://icetest.info and enter your turn server credentials to test the TURN server
Step 9: Setting a Domain name for the turn server (optional)
You can set up a domain name for your turn server as well
For this you will need to update your DNS records
Go to a domain registrar like godaddy or namecheap and purchase a domain name then
add the DNS record and wait until they find your service
Step 10: Encryption using the COTURN server using lets encrypt (optional)
We can use the certbot from lets encrypt to easily generate the TLS certificate
enter the following commands in your TURN servers terminal
$ sudo add-apt-repository ppa:certbot/certbot
$ sudo apt-get update
$ sudo apt-get install certbot
then you can run a certbot commond to generate the certificate. Replace the <turn.example.com> with the domain name of your TURN server
$ sudo certbot certonly --standalone --preferred-challenges http \
    -d <turn.example.com>
Take note that the TCP port 80 needs to be open for that to happen
Currently the cretbot automatically renews by default
to ensure that the certificates are readable by coturn which in turn runs the service turn server let us add a renewable hook to the let's encrypt
let us first create a directory
$ sudo mkdir -p /etc/letsencrypt/renewal-hooks/deploynext create the file
$ sudo mkdir -p /etc/letsencrypt/renewal-hooks/deploywith the following contents. Replace teh hostname of your TURN server
#!/bin/bash -e
for certfile in fullchain.pem privkey.pem ; do
	cp -L /etc/letsencrypt/live/<turn.example.com>/"${certfile}" /etc/turnserver/"${certfile}".new
	chown turnserver:turnserver /etc/turnserver/"${certfile}".new
	mv /etc/turnserver/"${certfile}".new /etc/turnserver/"${certfile}"
done
systemctl kill -sUSR2 coturn.service
Make this file executable
$ sudo chmod 0755 /etc/letsencrypt/renewal-hooks/deploy/coturnand that's it we have added the encryption to the TURN server
Docket Compose Example ( Optional)
You can also run CoTURN with Docker compose, this lets you version control, start/stop the service with a single command.
version: "3.9"

services:
  coturn:
    image: coturn/coturn:4.6.3      # pin to the current stable tag
    container_name: coturn
    restart: unless-stopped
    ports:
      # STUN/TURN
      - "3478:3478"
      - "3478:3478/udp"
      # TLS-TURN
      - "5349:5349"
      - "5349:5349/udp"
      # RTP/RTCP relays (adjust range if you need fewer ports)
      - "49152-65535:49152-65535/udp"
    environment:
      # Auto-detect public IP so you don’t have to hard-code it
      DETECT_EXTERNAL_IP: "yes"
      # Secure long-term credentials (generate once; keep secret)
      STATIC_AUTH_SECRET: "${TURN_STATIC_AUTH_SECRET}"
    volumes:
      # Bind your custom conf + persistent database & logs
      - "./turnserver.conf:/etc/coturn/turnserver.conf:ro"
      - "coturn-data:/var/lib/coturn"
      - "coturn-logs:/var/log"
    # Use host networking if you prefer not to publish individual ports
    # network_mode: "host"

volumes:
  coturn-data:
  coturn-logs:
How to launch
# 1) Export a strong auth secret (one-time)
export TURN_STATIC_AUTH_SECRET=$(openssl rand -hex 16)

# 2) Start in the background
docker compose up -d
Advanced Configuration (Optional)
TLS with Let's Encrypt
- Issue a certificate on the host (for this port 80 must be open)
sudo apt install certbot
sudo certbot certonly --standalone -d turn.yourwebsite.com
- Mount the certs into the container and point CoTURN at them
volumes:
  - "/etc/letsencrypt/live/turn.yourwebsite.com/fullchain.pem:/etc/ssl/certs/cert.pem:ro"
  - "/etc/letsencrypt/live/turn.yourwebsite.com/privkey.pem:/etc/ssl/private/privkey.pem:ro"
- Add to
turn server.conf
cert=/etc/ssl/certs/cert.pem
pkey=/etc/ssl/private/privkey.pem
- Auto renew hook
/etc/letsencrypt/renewal-hooks/deploy/reload-coturn.sh
#!/bin/bash
docker compose restart coturn
2. Security Hardening
Add rate-limiting (user-quota / total-quota) and enable log-file=/var/log/turn.log for audit trails.
Here are some of our other articles that you might be interested in
Conclusion
This is how you can configure the turn server in your docker container. I hope you found the article helpful
Thank you for reading
Metered Global TURN servers
- API: TURN server management with powerful API. You can do things like Add/ Remove credentials via the API, Retrieve Per User / Credentials and User metrics via the API, Enable/ Disable credentials via the API, Retrieve Usage data by date via the API and much more.
- Global Geo-Location targeting: Automatically directs traffic to the nearest servers, for lowest possible latency and highest quality performance.
- Servers in 12 Regions of the world: Toronto, Miami, San Francisco, Amsterdam, London, Frankfurt, Bangalore, Singapore,Sydney
- Low Latency: less than 50 ms latency, anywhere across the world.
- Cost-Effective: pay-as-you-go pricing with bandwidth and volume discounts available.
- Easy Administration: Get usage logs, emails when accounts reach threshold limits, billing records and email and phone support.
- Standards Compliant: Conforms to RFCs 5389, 5769, 5780, 5766, 6062, 6156, 5245, 5768, 6336, 6544, 5928 over UDP, TCP, TLS, and DTLS.
- Multi‑Tenancy: Create multiple credentials and separate the usage by customer, or different apps. Get Usage logs, billing records and threshold alerts.
- Reliability: 99.999% Uptime with SLA.
- Enterprise Scale: : With no limit on concurrent traffic or total traffic. Metered TURN Servers provide Enterprise Scalability
- 50 GB/mo Free: Get 50 GB every month free TURN server usage with the Free Plan
You can create an account on Metered website and get 50GB of Free TURN usage every month