Streaming The Meeting To Twitch
In this article we are going to learn about streaming to Twitch live.
Streaming to Twitch Live
- go to twitch.tv and log in to your twitch account
- click on the profile on your top right hand side corner
- then click on the settings
- Once you are on the settings pafe click on the channel and video, this will take you to the creator dashboard where you can see the stream key and different preferences
- select preferences, your primary steam key will be at the top of the page

Step 2. Using the Stream Key and URL in Metered
Screenshots below show the new dashboard. If you use the classic dashboard, pick the Classic dashboard tab — your choice is remembered on every page. You can switch at any time: Old dashboard in the header takes you back to the classic dashboard, and dashboard.metered.ca/v2 opens the new one. What changed in the new dashboard →
- New dashboard
- Classic dashboard
Now, go to the new Metered dashboard at dashboard.metered.ca/v2:
-
Go to Video API & SDK → Rooms and click Create room, or
-
To change a room you already have, open its ⋮ menu in the Rooms list and click Edit (or open the room and click Edit). Changes apply from the room's next meeting session.
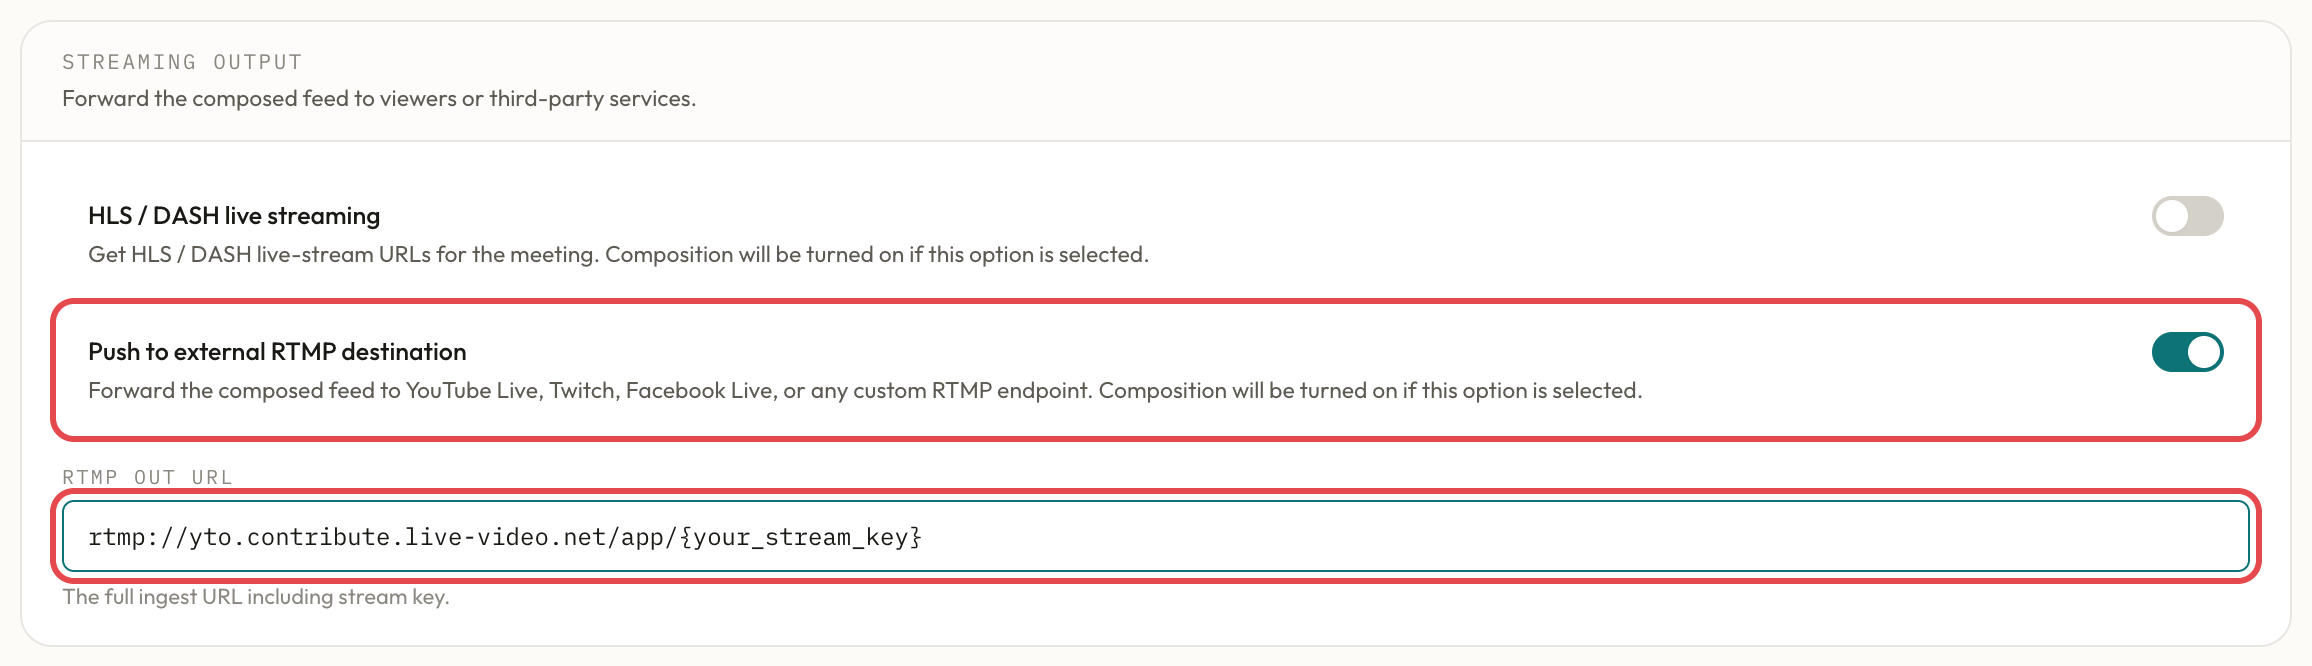
In the Streaming output section, switch on Push to external RTMP destination.
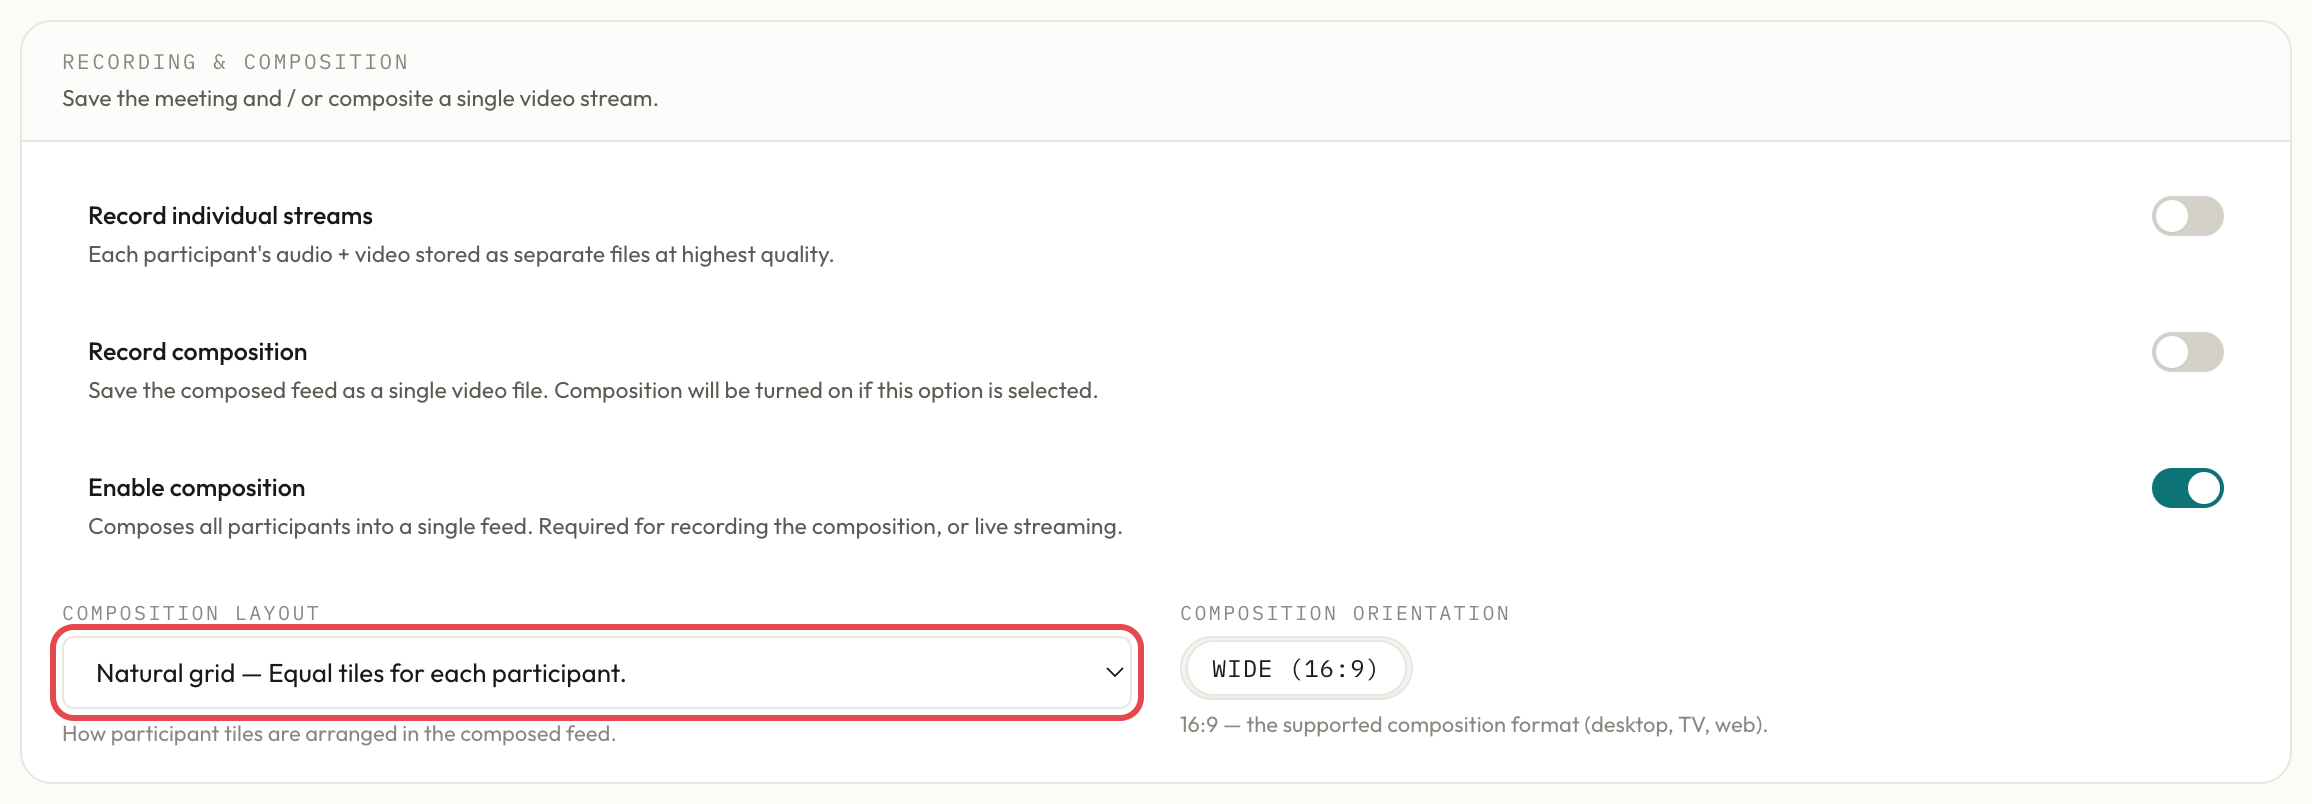
Enabling RTMP Out will also enable Composition. You can select the layout of your RTMP stream in the Composition layout menu, in the Recording & composition section of the same form.
Add the RTMP URL plus the key in the RTMP OUT URL field. In Twitch this would be like:
rtmp://yto.contribute.live-video.net/app/{your_stream_key}
For a list of RTMP URLs from Twitch, click here.
Then click Create room (or Update room if you are editing).
Now, go to the Metered Dashboard here
-
click on the
Create Roombutton or -
Click on the
Roomsbutton then click on the room name to openRoom Summarythere click on theedit roombutton to edit the room.
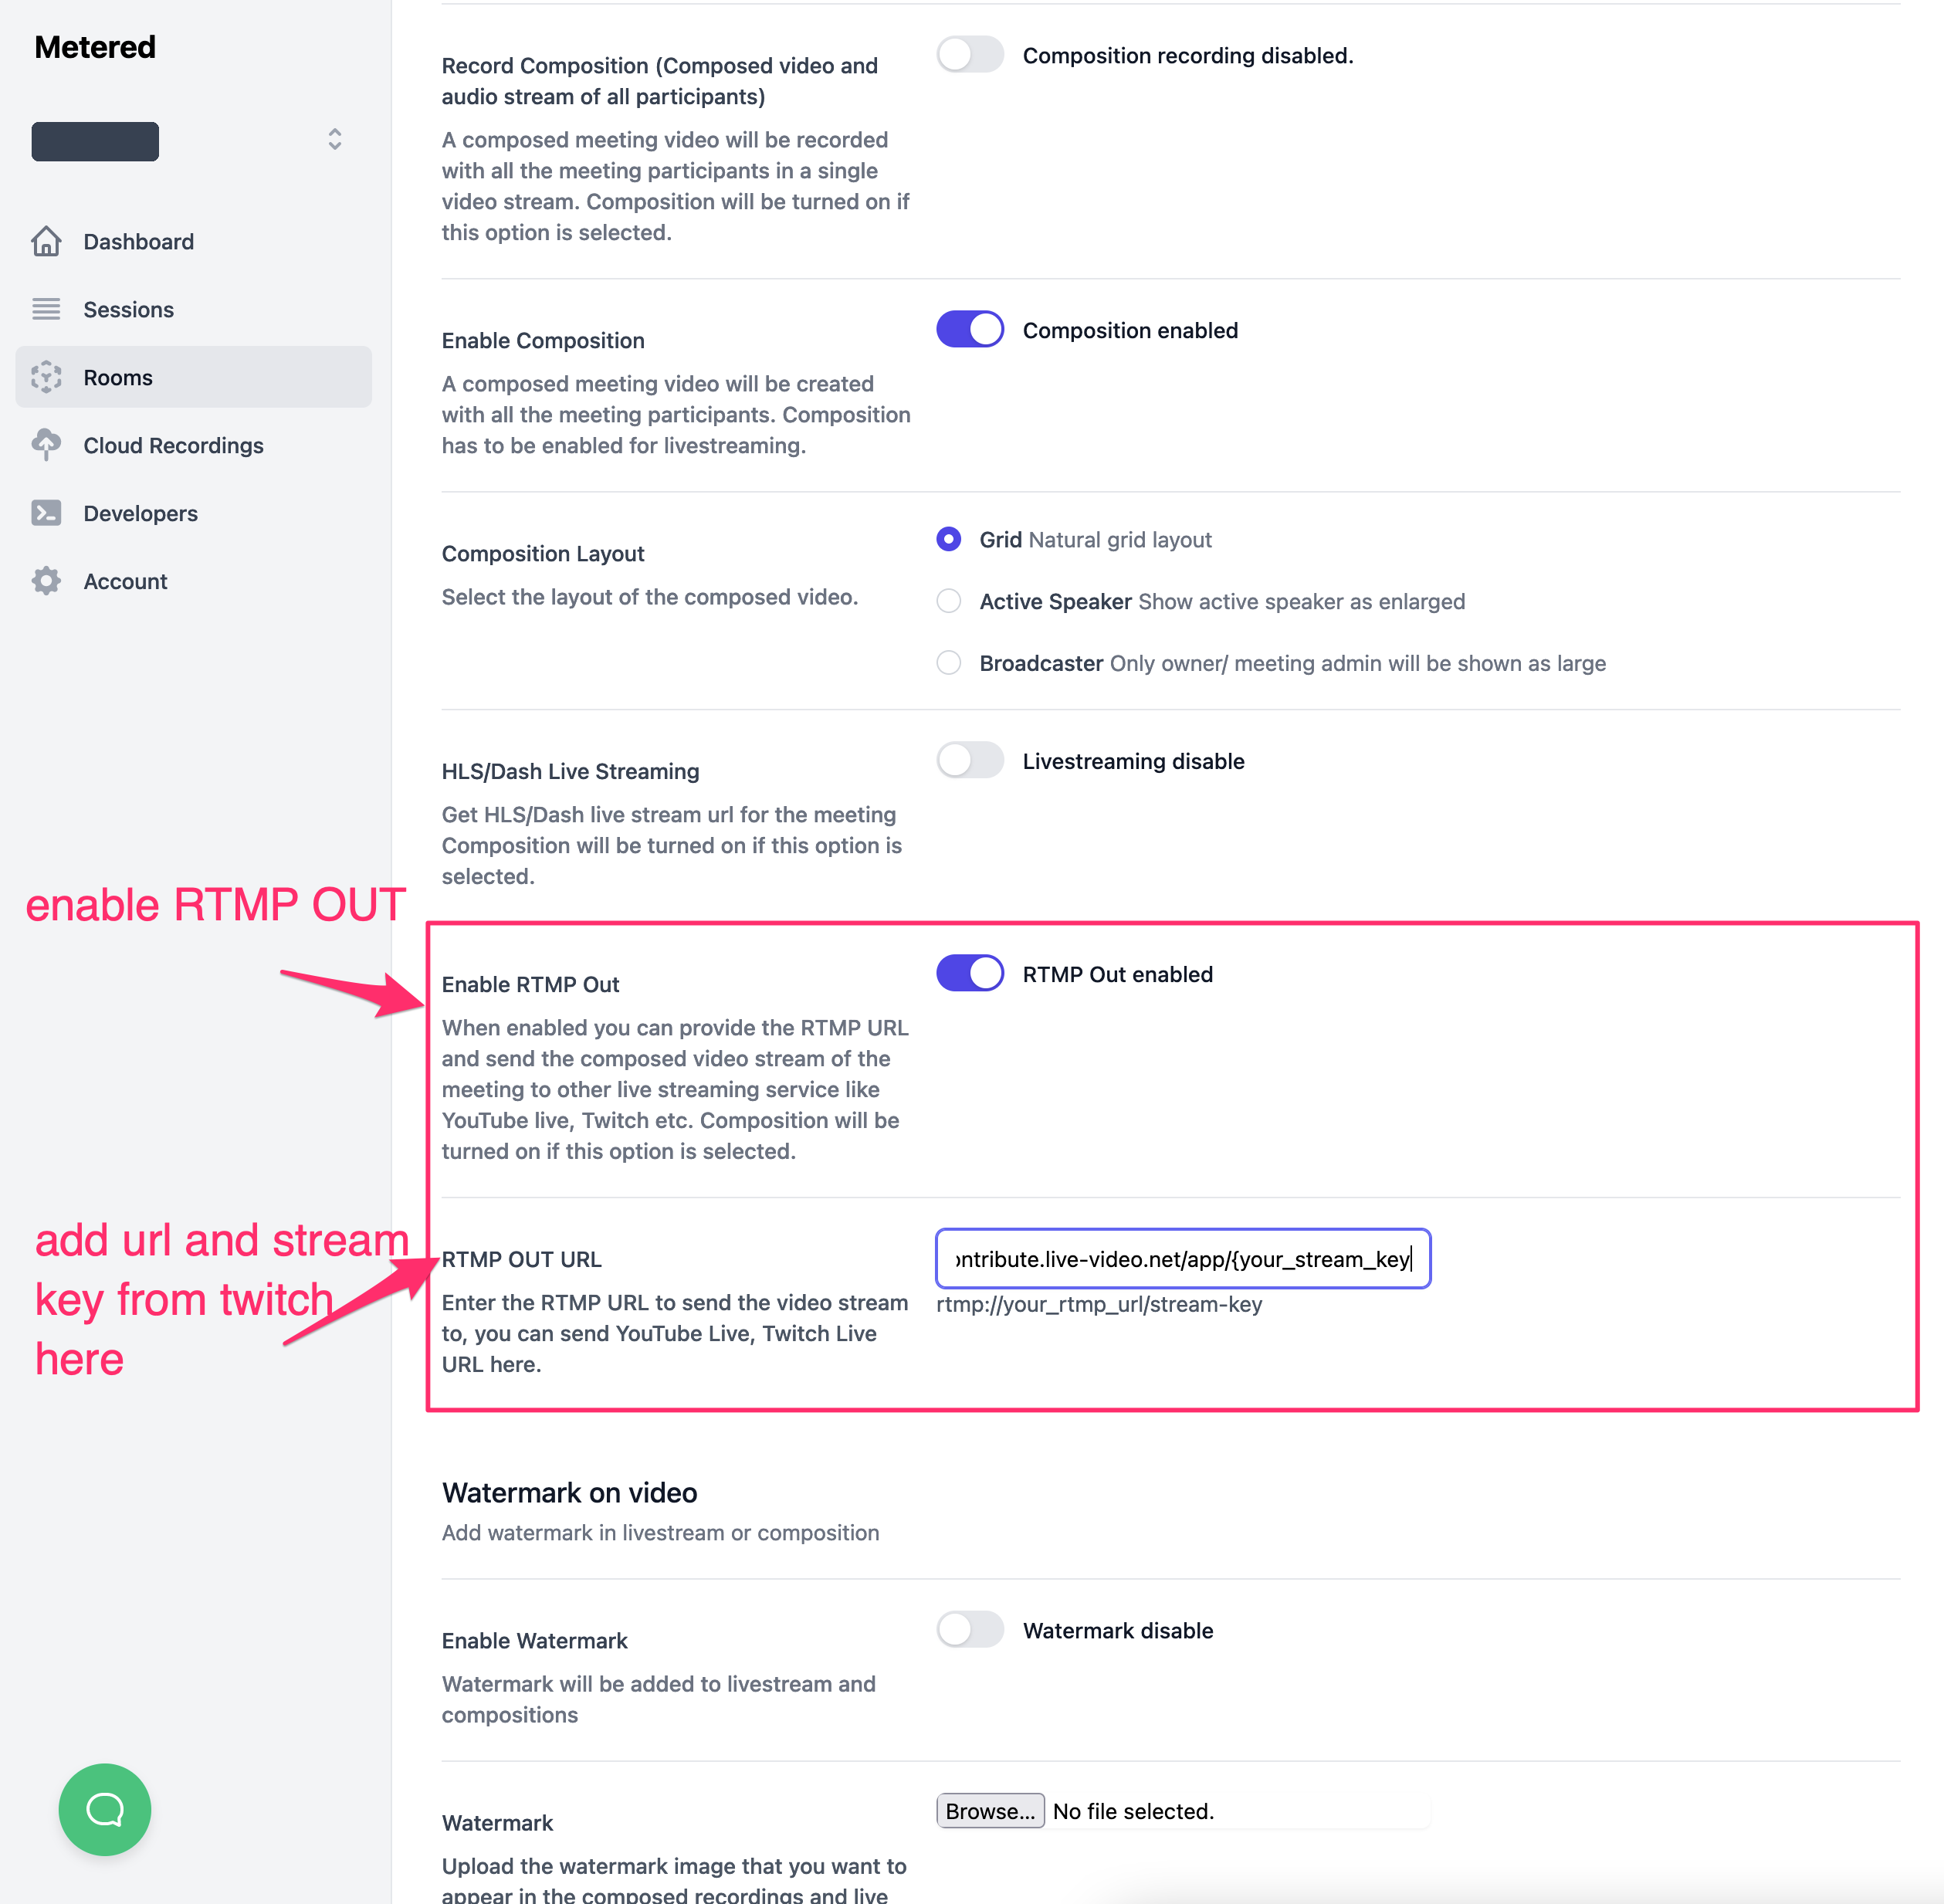
On the edit room page scroll down to the Enable RTMP Out button and enable it.
Enabling RTMP Out will also enable Composition. You can select the layout of your RTMP stream in the Composition layout section.
add the RTMP URL plus the key on the RTMP OUT URL SECTION below. In twitch this would be like
example:
rtmp://yto.contribute.live-video.net/app/{your_stream_key}
for a list of RTMP URLS from twitch Click Here
Selecting Stream Layout
- New dashboard
- Classic dashboard
You can select the layout of your live stream in the Composition layout menu, in the Recording & composition section of the room form. The new dashboard offers two layouts:
- Natural grid: equal tiles for each participant
- Active speaker: shows the current speaker enlarged
The Broadcaster layout (only the owner / meeting admin shown large) is not in the new dashboard's menu yet. To use it, set the layout on the classic dashboard.
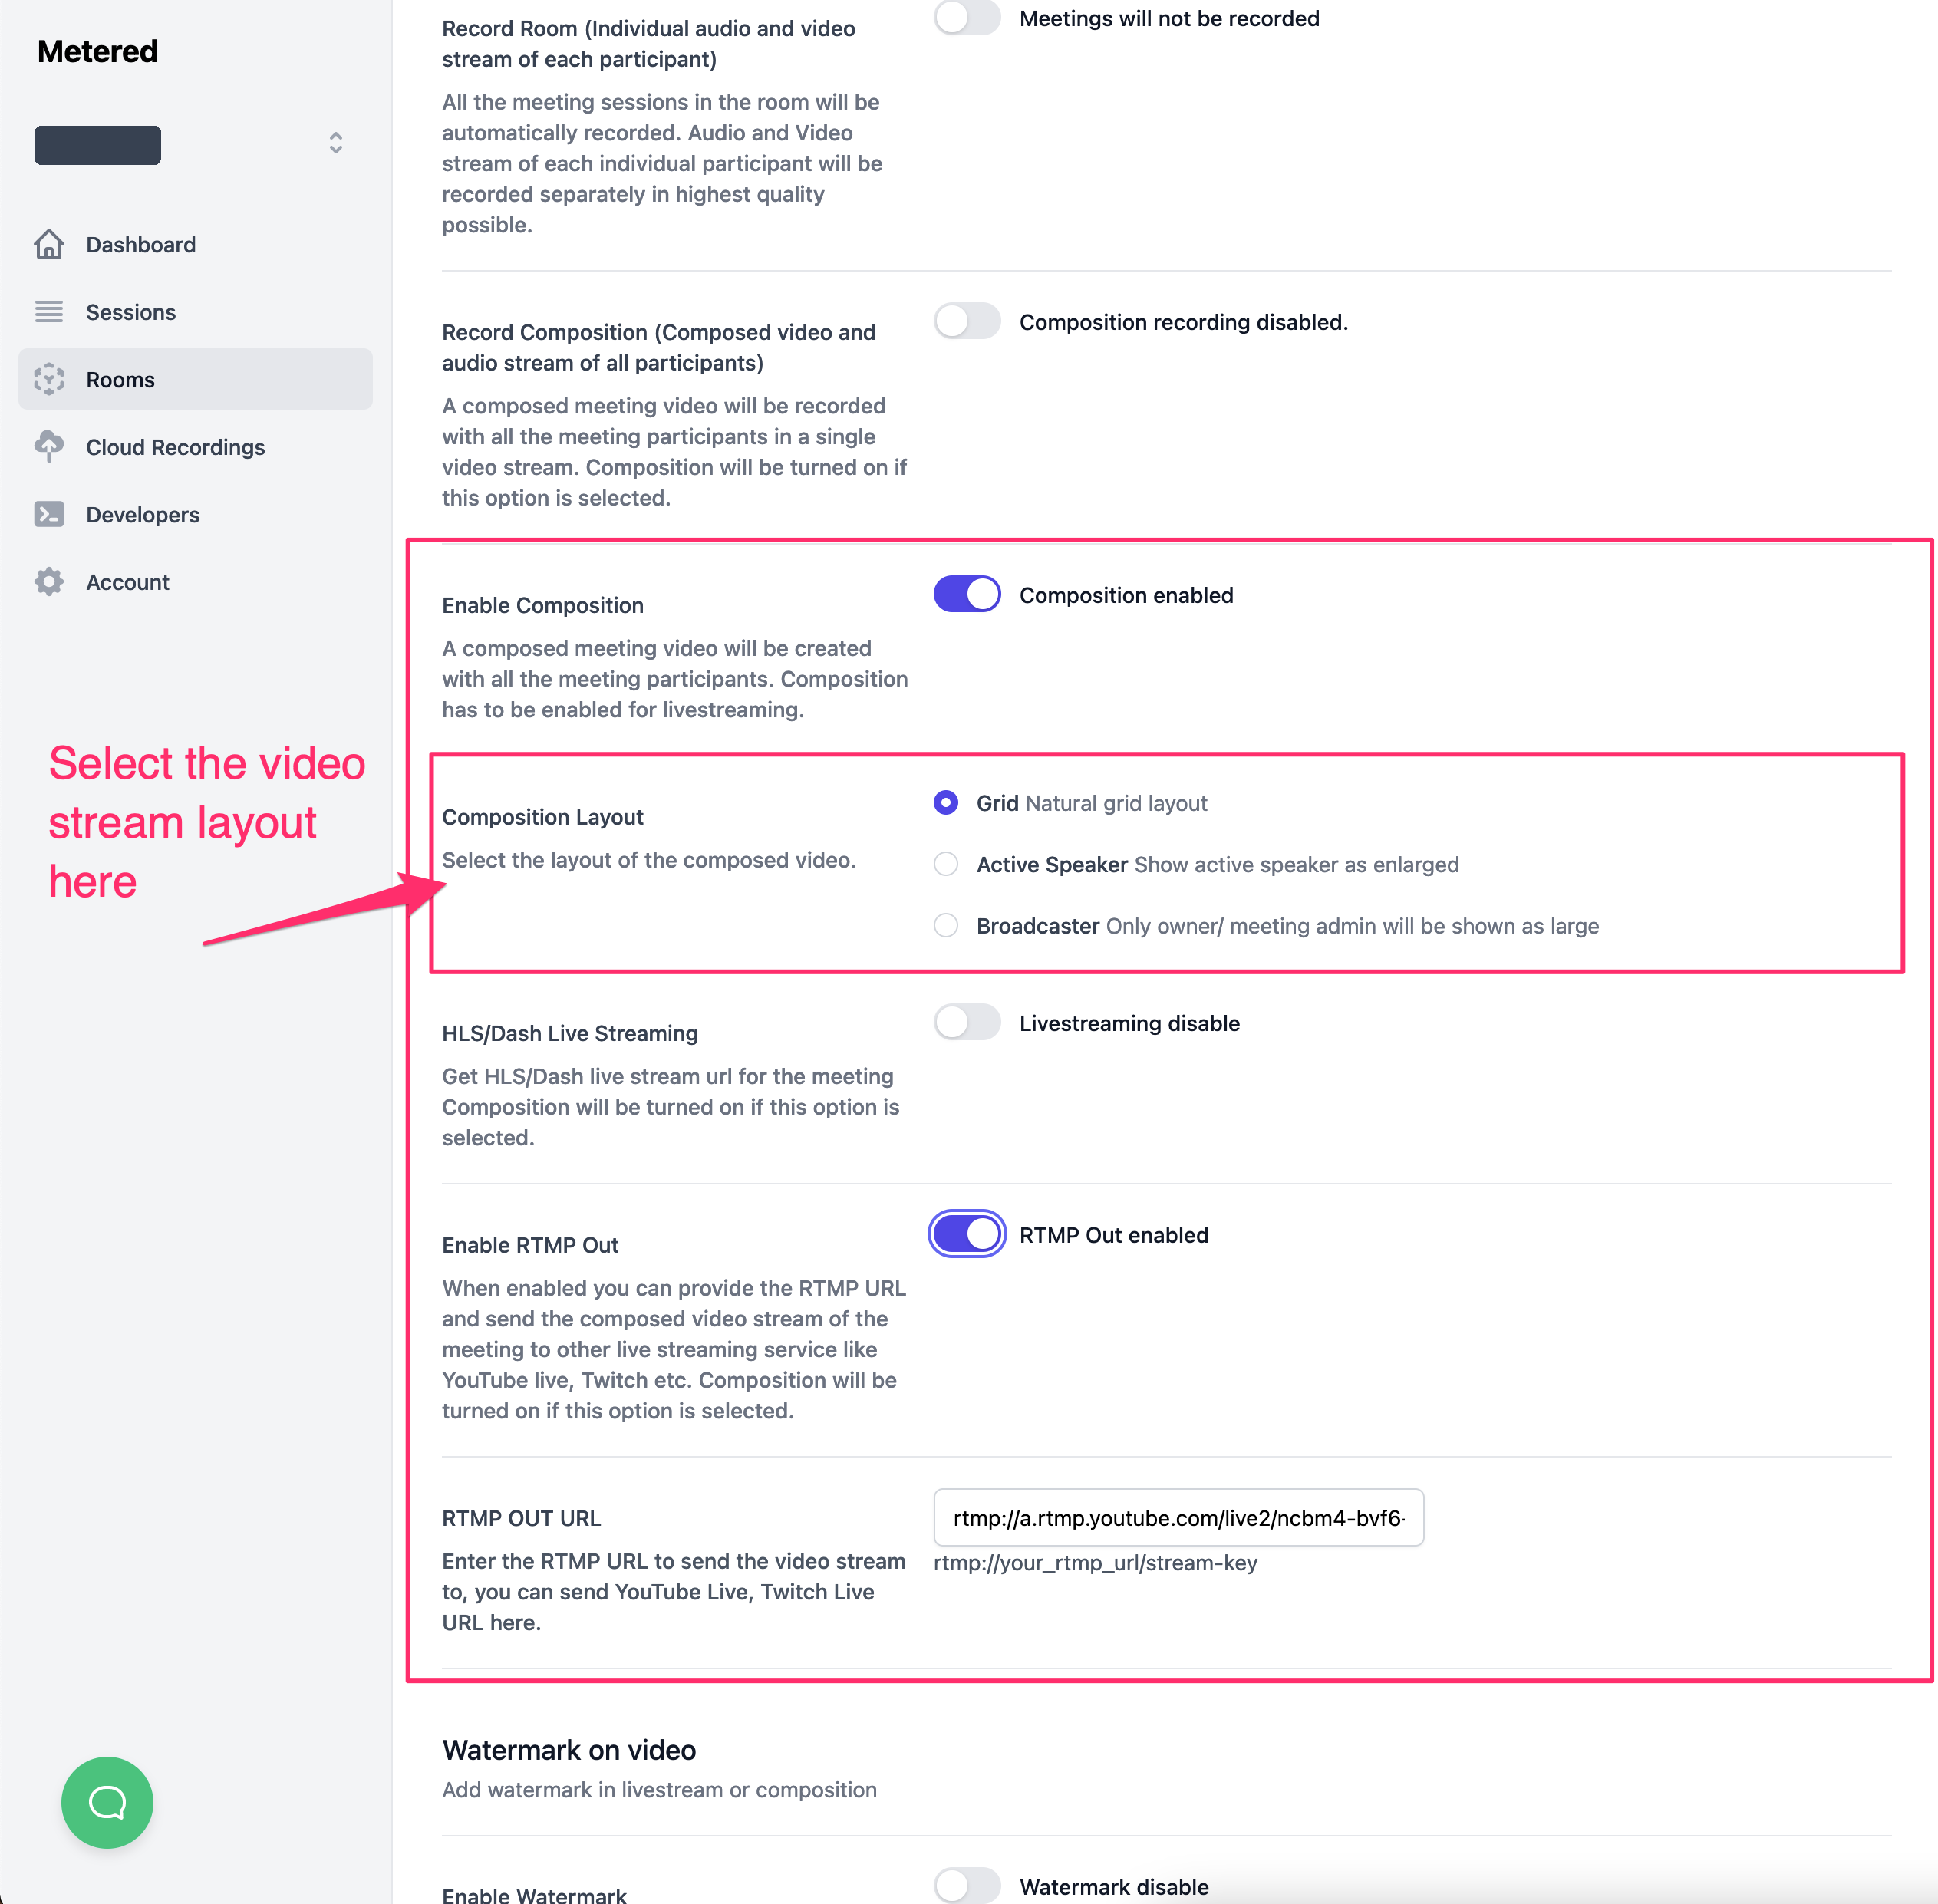
You can select the layout of your live stream in the composition Layout section we have three options as of now
- Grid: Natural Grid
- Active Speaker: Show active speaker as enlarged
- Broadcaster: Only owner/ meeting admin will be shown as large
Adding Watermark to Video Stream
- New dashboard
- Classic dashboard
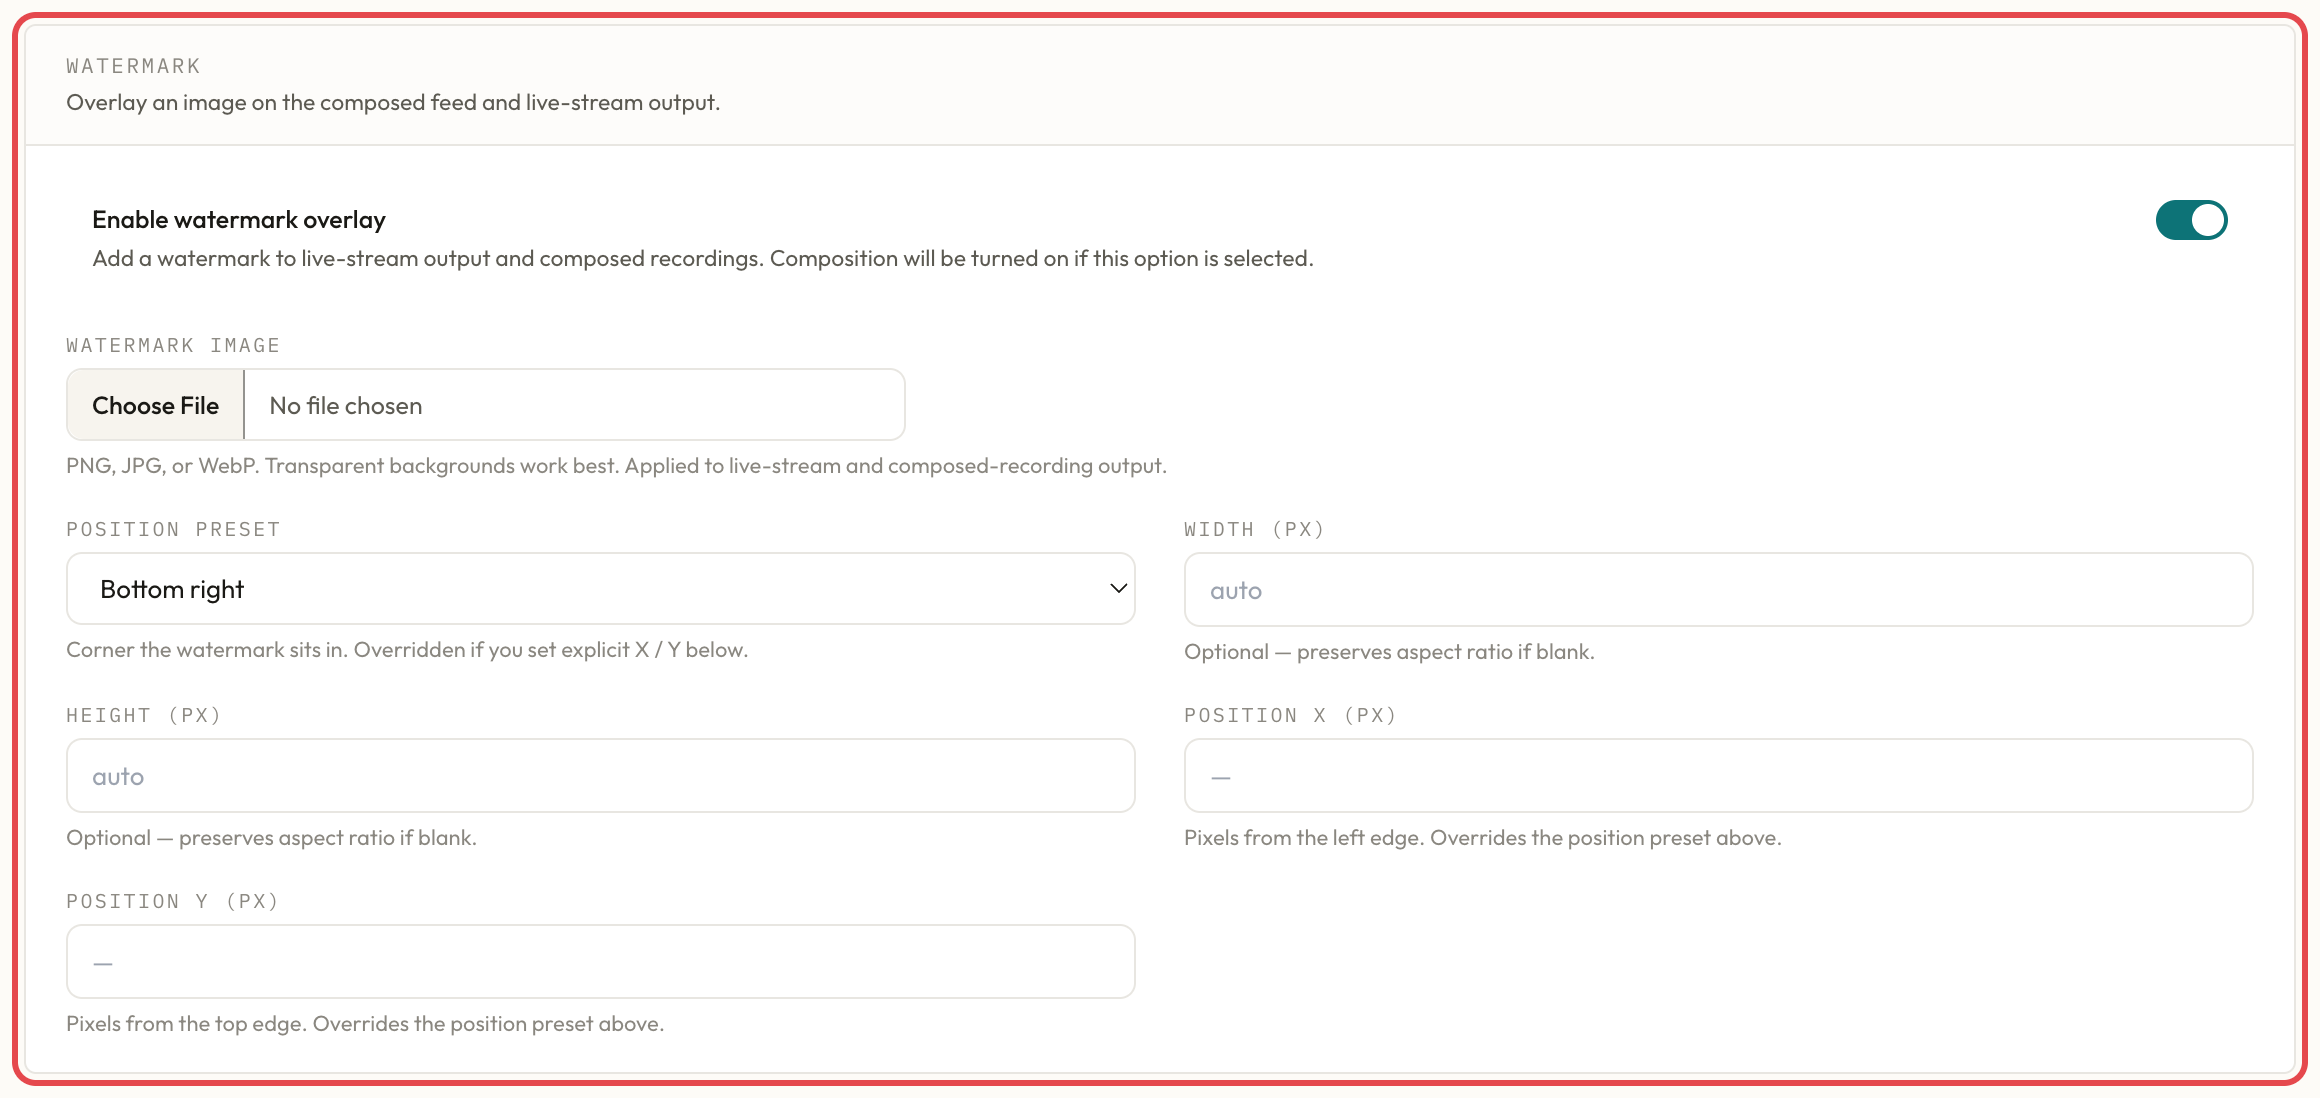
You can easily add a watermark to your video stream. Scroll down to the Watermark section of the room form and switch on Enable watermark overlay.
Upload the image you want to use under Watermark image.
You can also adjust the position and size of the watermark with Position preset, Width (px), Height (px), Position X (px) and Position Y (px). You can see the options below.
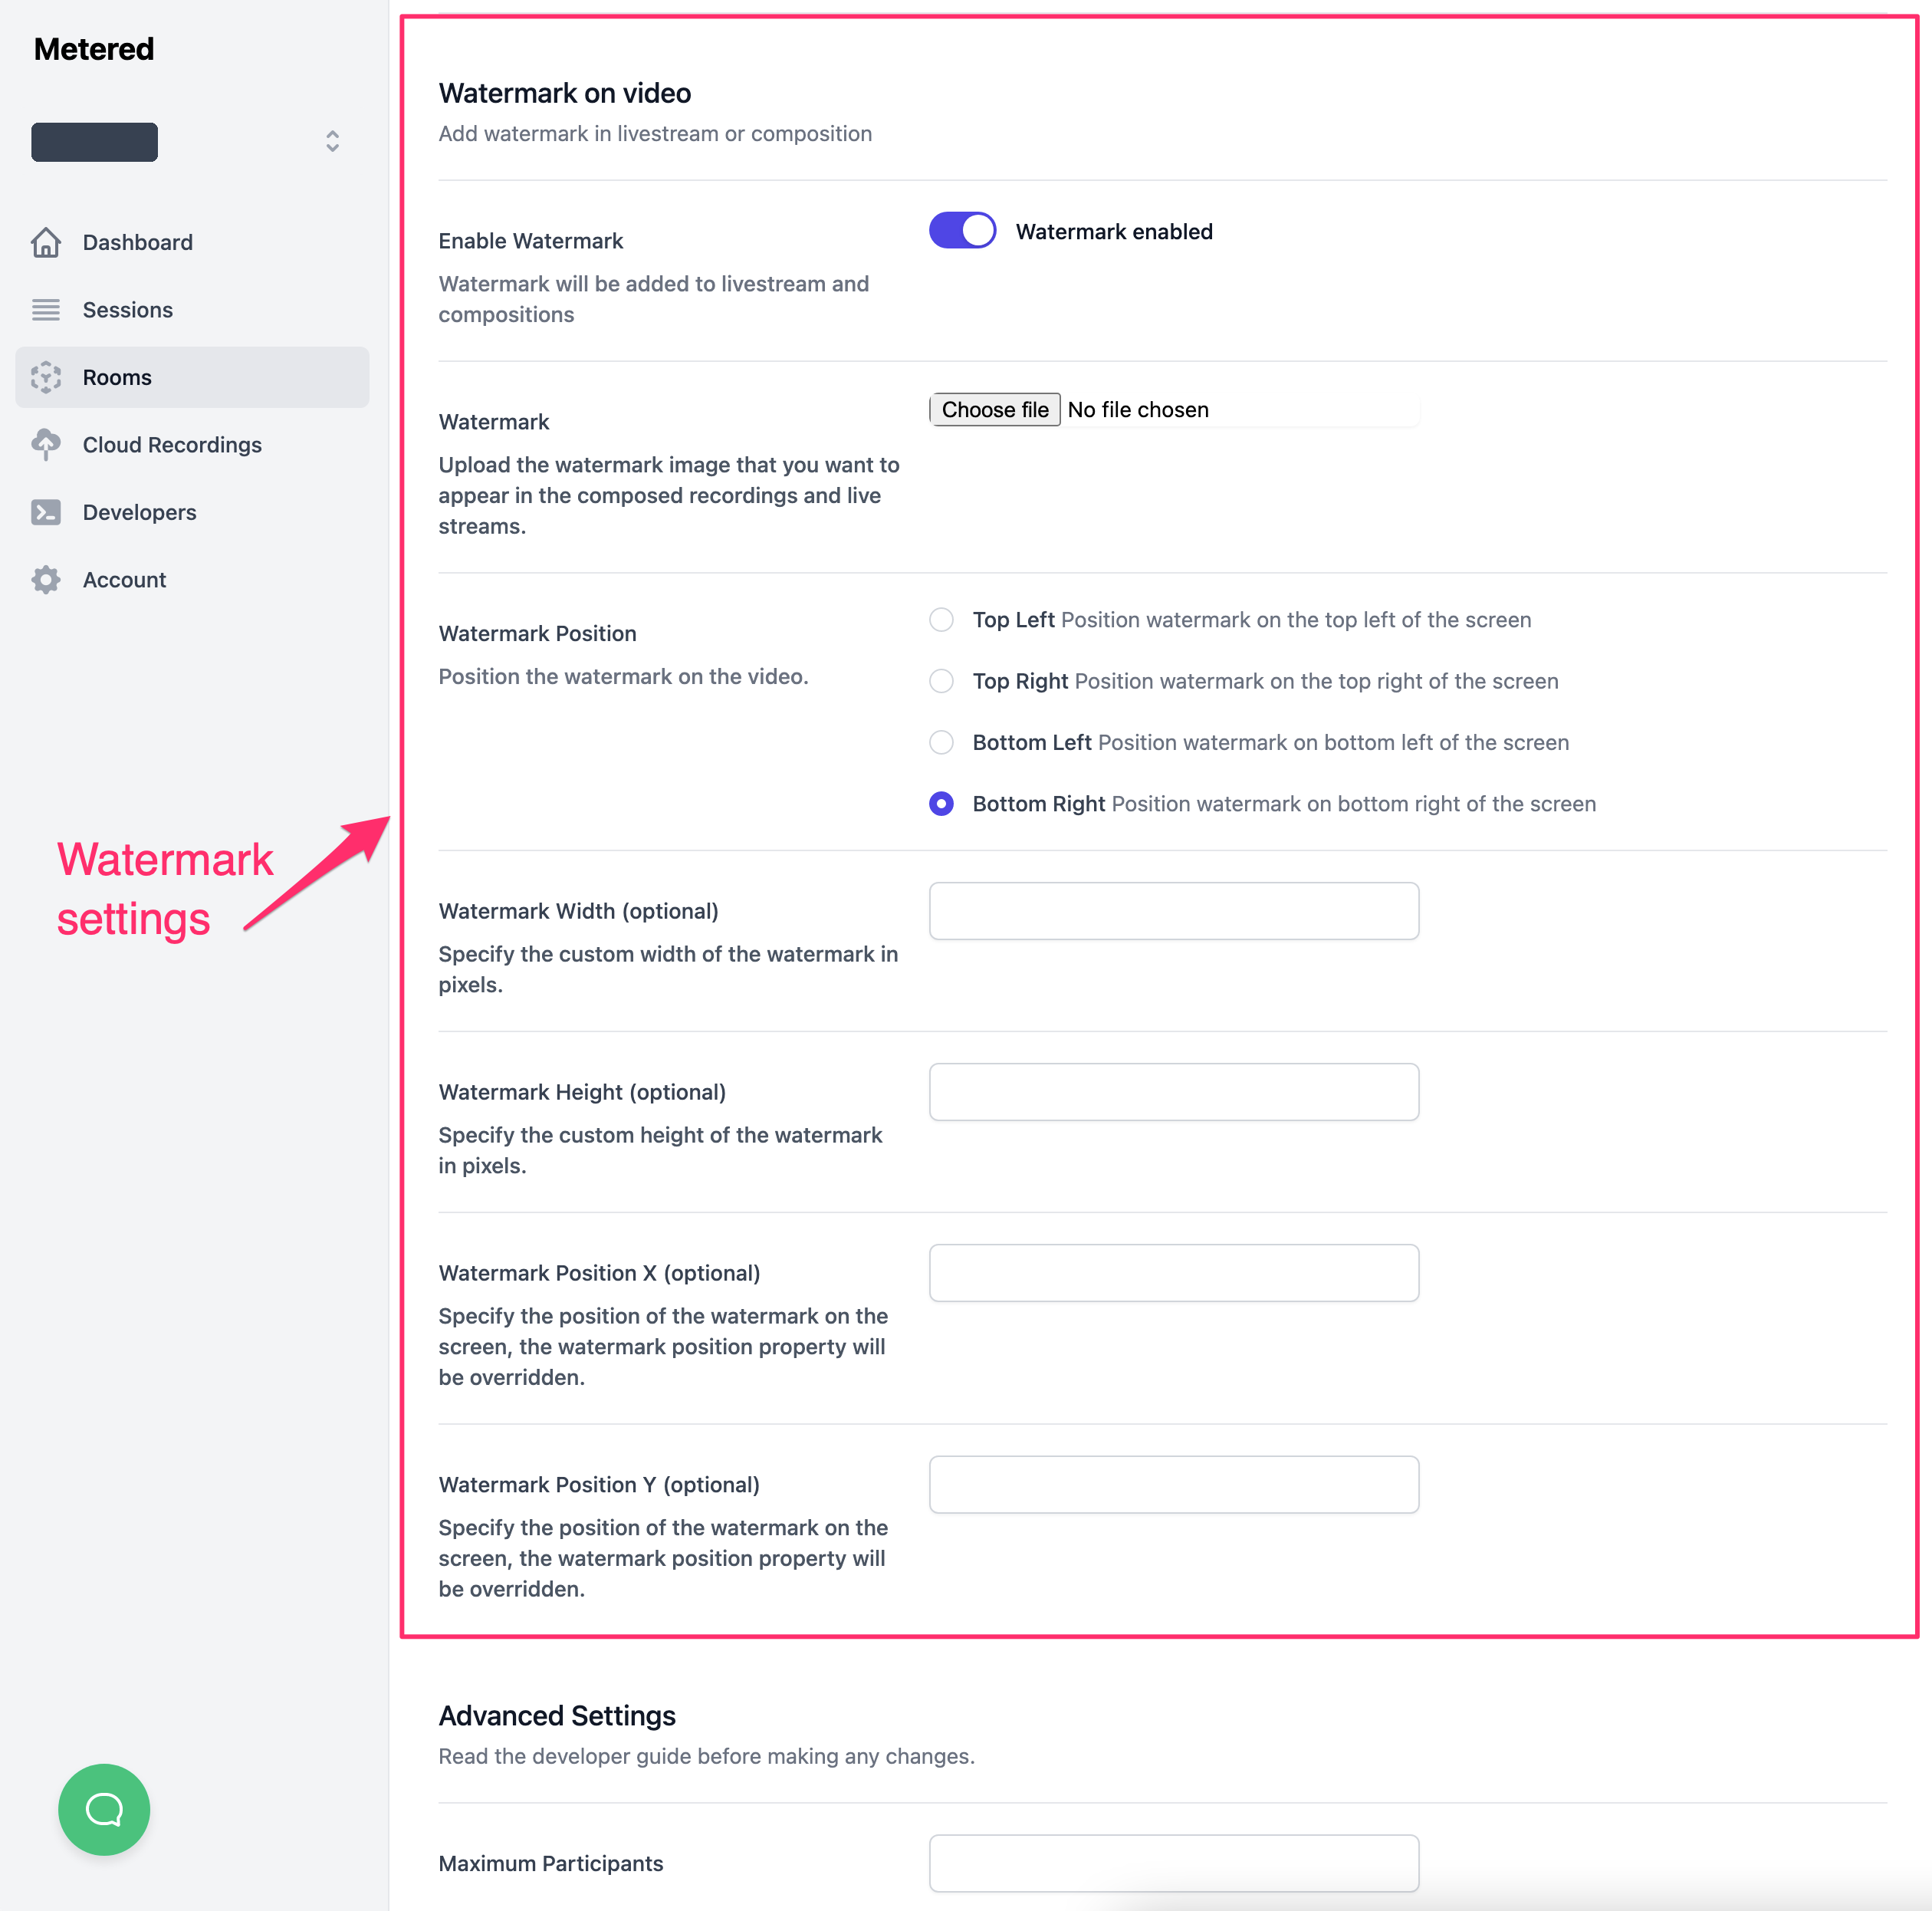
You can easily add watermark to your video stream. Just scroll down to the watermark section and enable the watermark on video
You can also easily upload an image to add as a watermark on your video.
We also have the ability to adjust the position and size of the watermark. you can see the options below.
Recording the Stream
You can also record the meeting while streaming it to your live audience.
To learn more about recording composed streams click here